Installing and using the launcher
📌 Launcher Installation and Usage
In this article, we will cover:
⦁ What our launcher can do;
⦁ How to install it;
⦁ How to use it.
Key Features of the Launcher
🧭 Guides you step-by-step — Simple and clear instructions on how to use the equipment and games — even if you're new to VR, everything is intuitive.
⚙️Manages content — Installation and launching of games happen directly from the device — no extra steps or switching needed.
📘Informs — Each game has a short description so you understand the experience beforehand.
🧰 Supports — Full support built right into the launcher, so help is always at hand.
Launcher Installation Instructions:
1. Download the installer via the provided link.
2. Install the launcher on your device following the standard installation procedure.
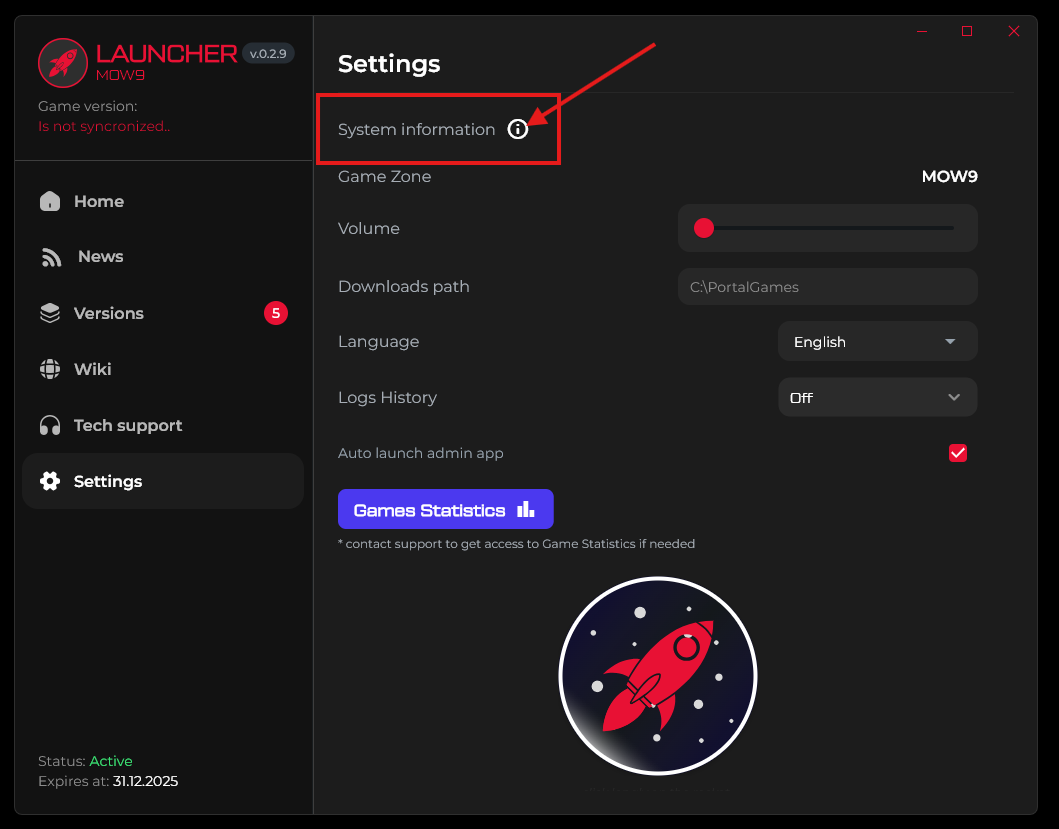
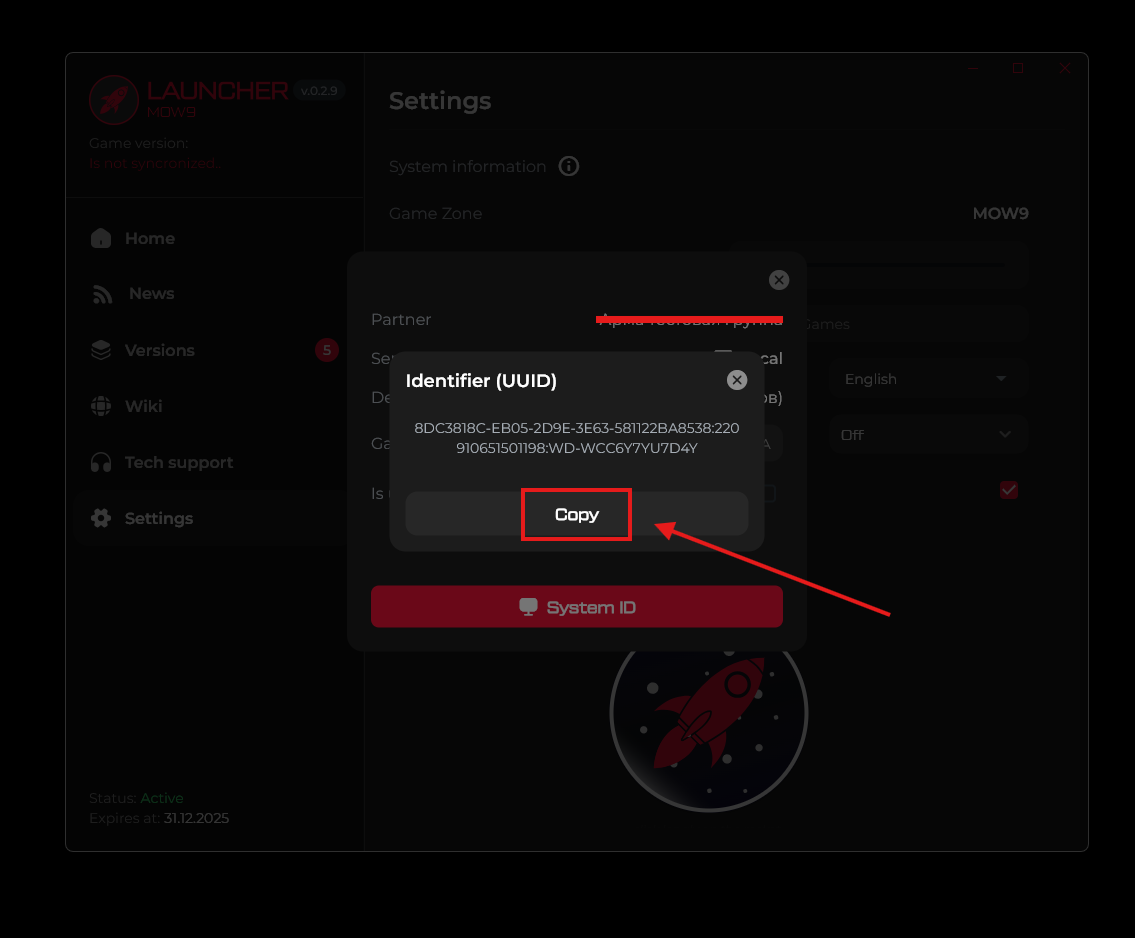
3. After installation, open the launcher and go to the "Settings" tab.
4. Navigate to "System Information".
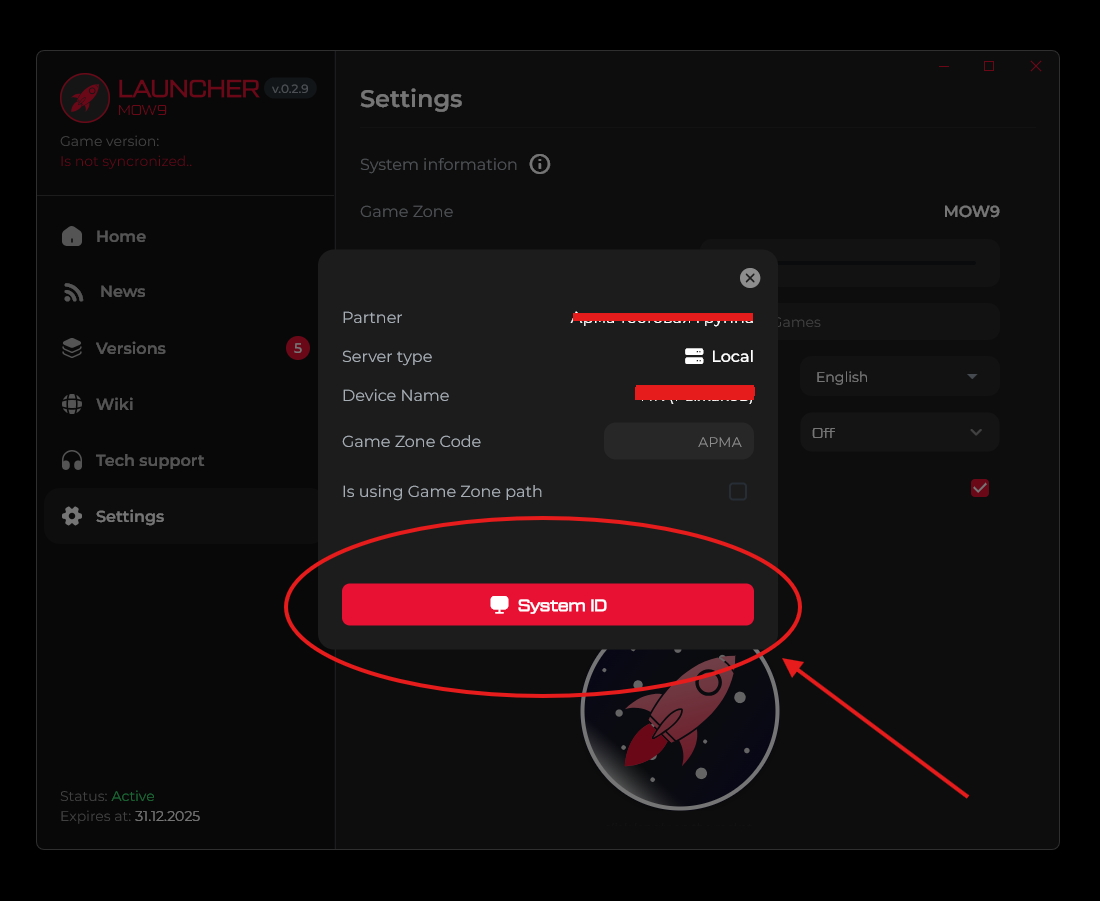
5. Find the "System ID" field.
6. Copy the ID.
7. Write to the technical support system and send:
- the copied ID of the System
- Your legal entity (This is necessary for us to add you to the database.)
- after you receive a message from us that everything is ready - restart the launcher.
🎮 User manual:
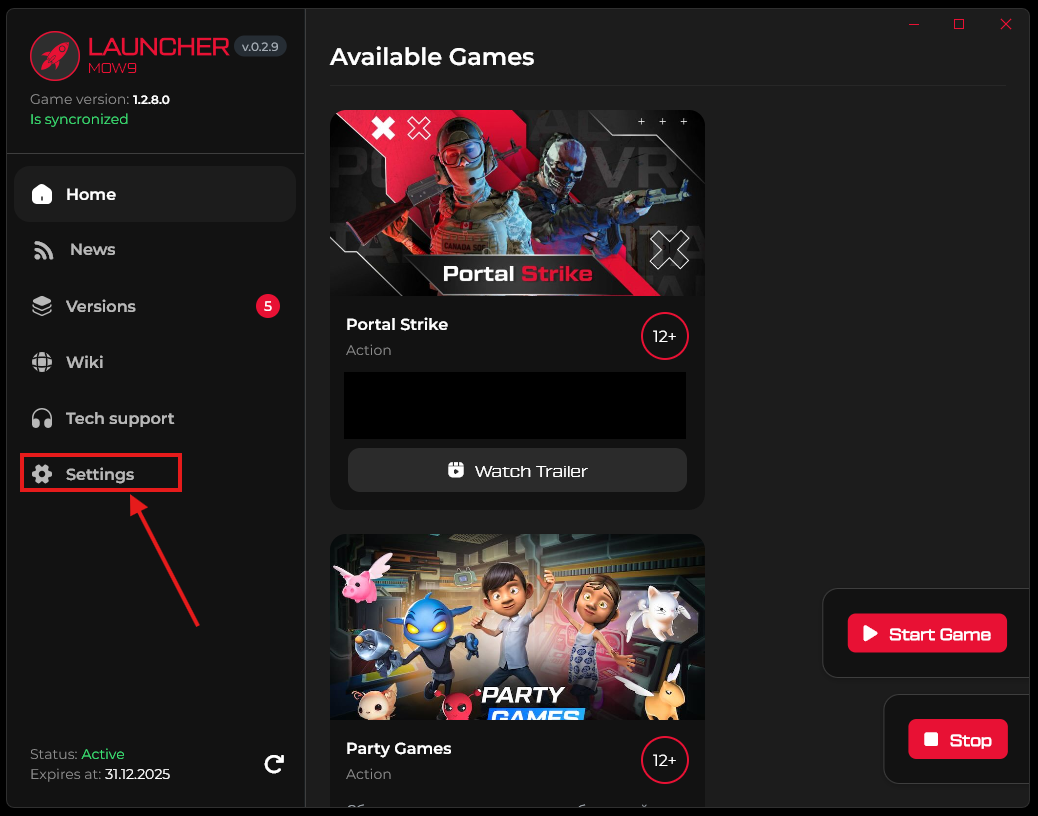
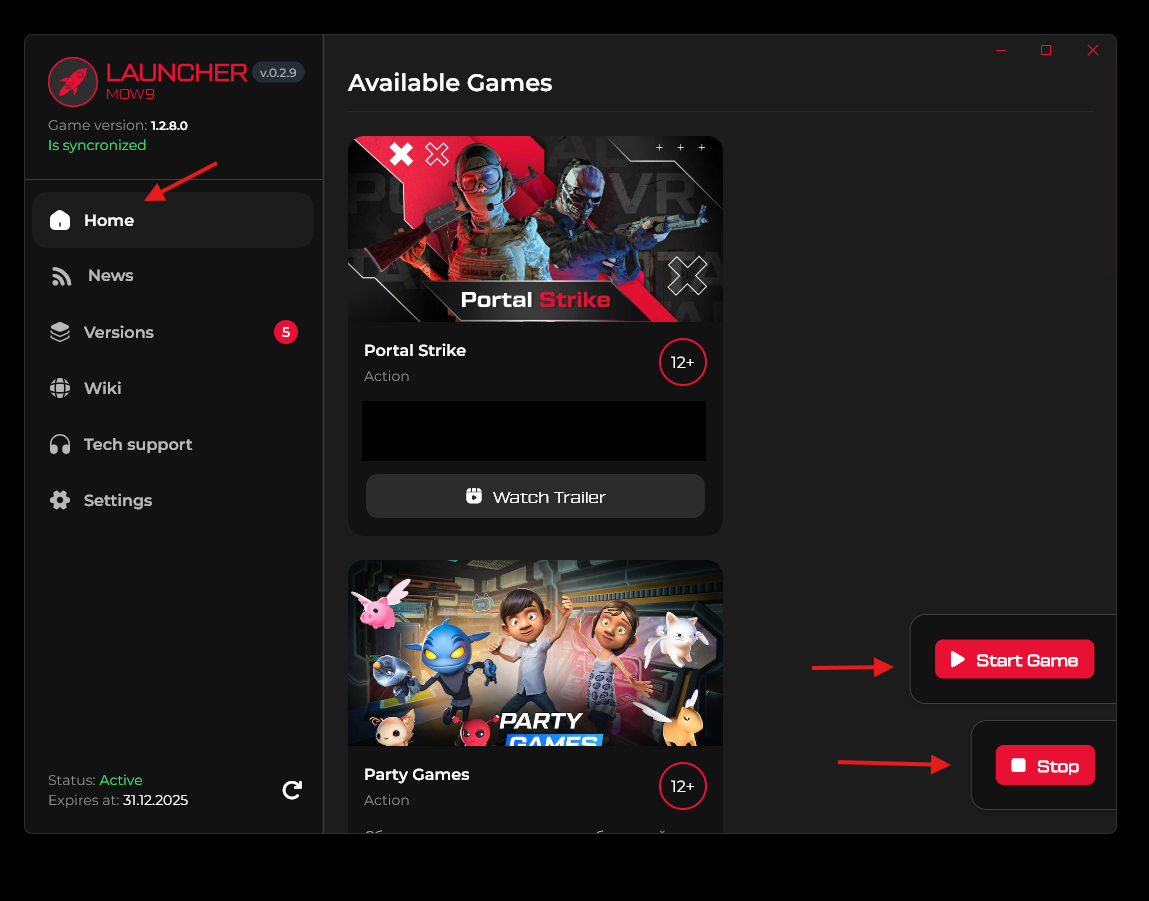
After launching the launcher, you will be taken to the main tab with promotional videos. There are two main control buttons:
▶️ Start Game - Starts the selected game on the local server.
Now you don't need to manually navigate to the game folders - everything is done automatically.
⏹️ Stop - Stops all local server processes.
Closes the game if it was running.
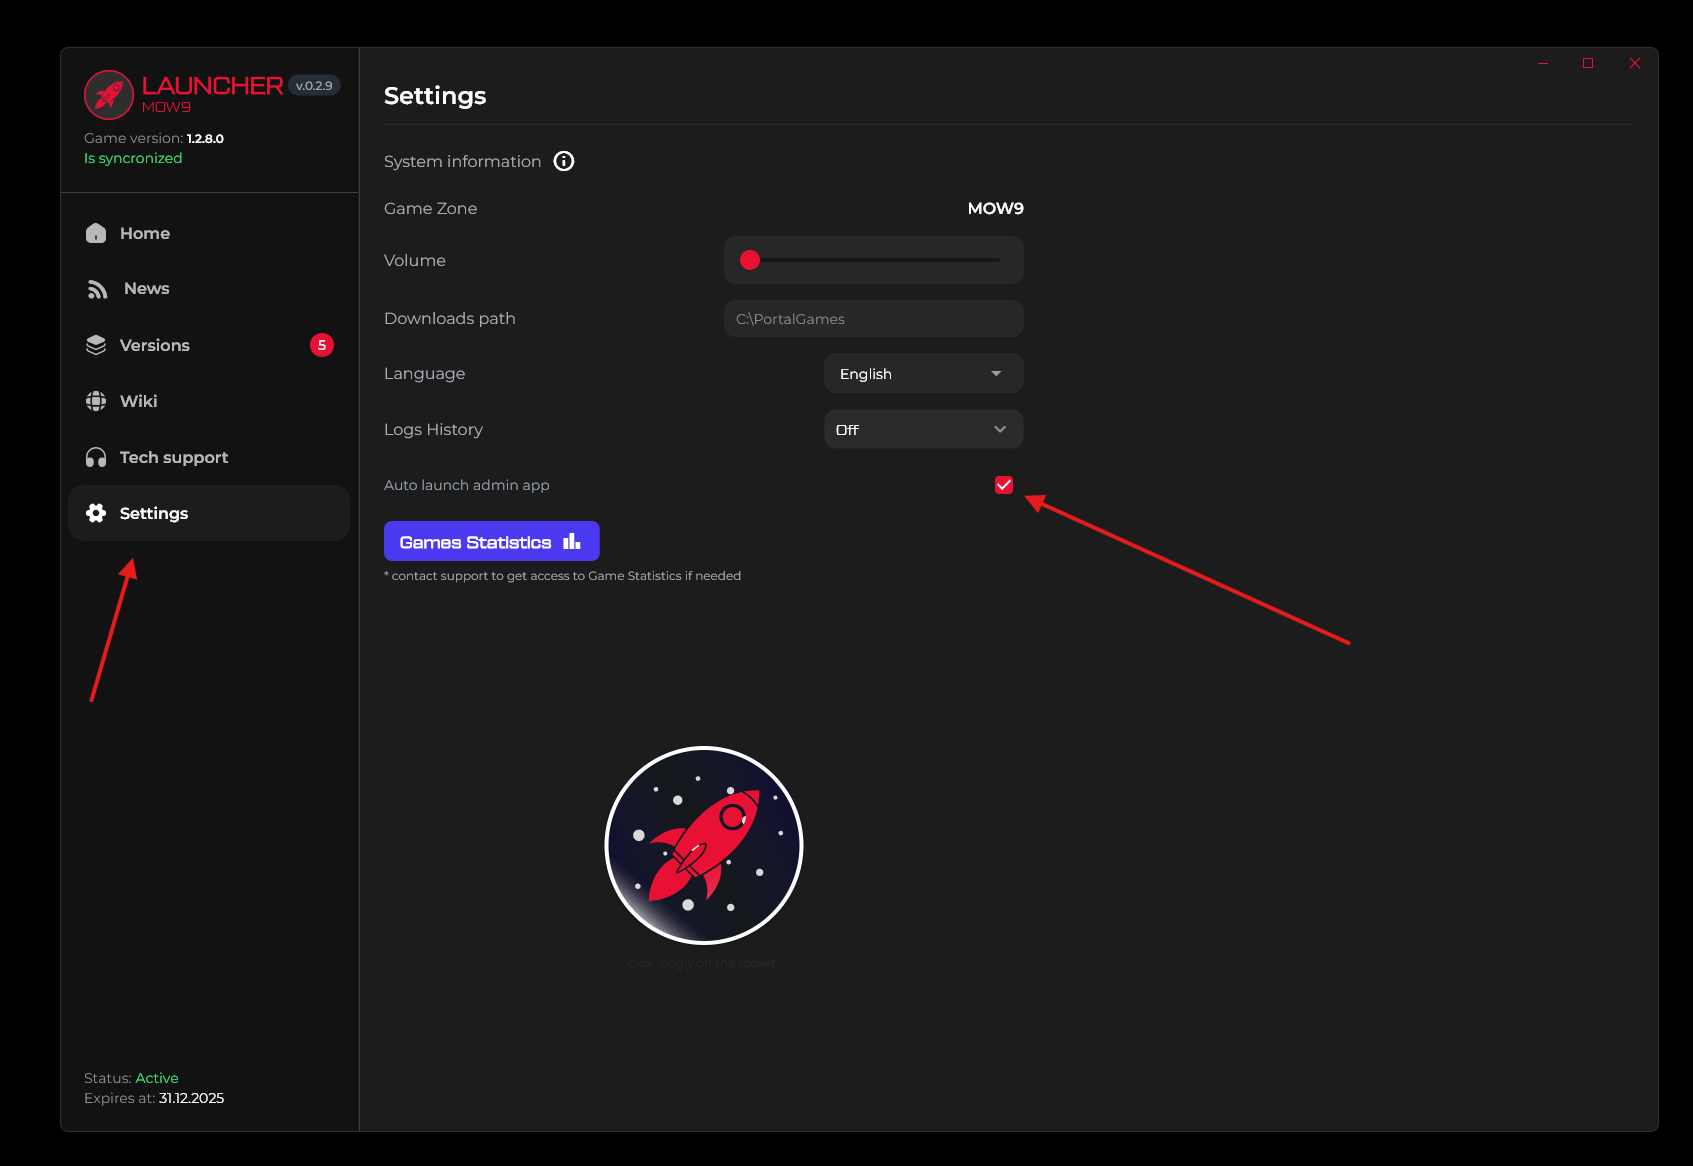
If you are using a tablet for administration, you can disable the option to launch the admin panel on your PC. Go to the settings section and disable the option to automatically launch the admin app
📥 Versions
1. Installing the game on your device via the launcher:
- Download the latest version of the game that is compatible with your device.
- Connect your VR headset or tablet to your computer.
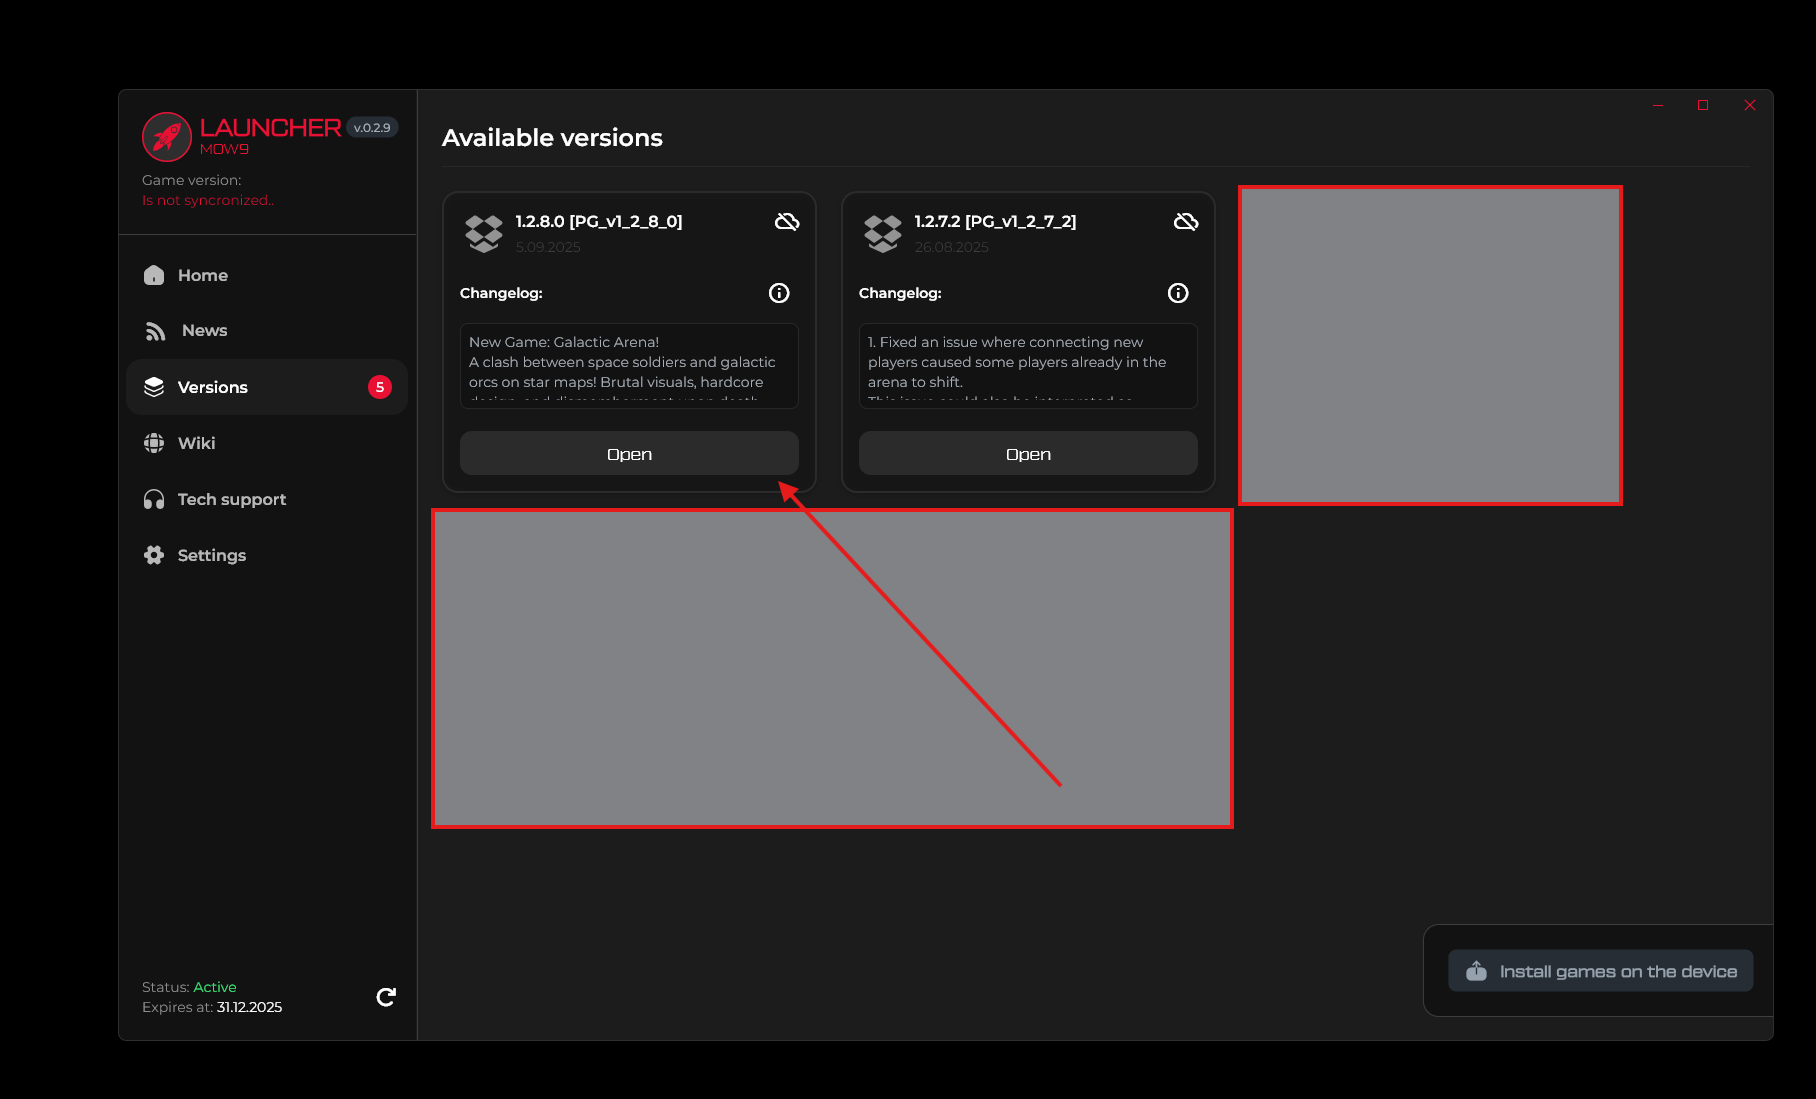
- Click on the "Install Games on Device" button.
- Once the installation is complete, click on the "Update" button to finish the process.

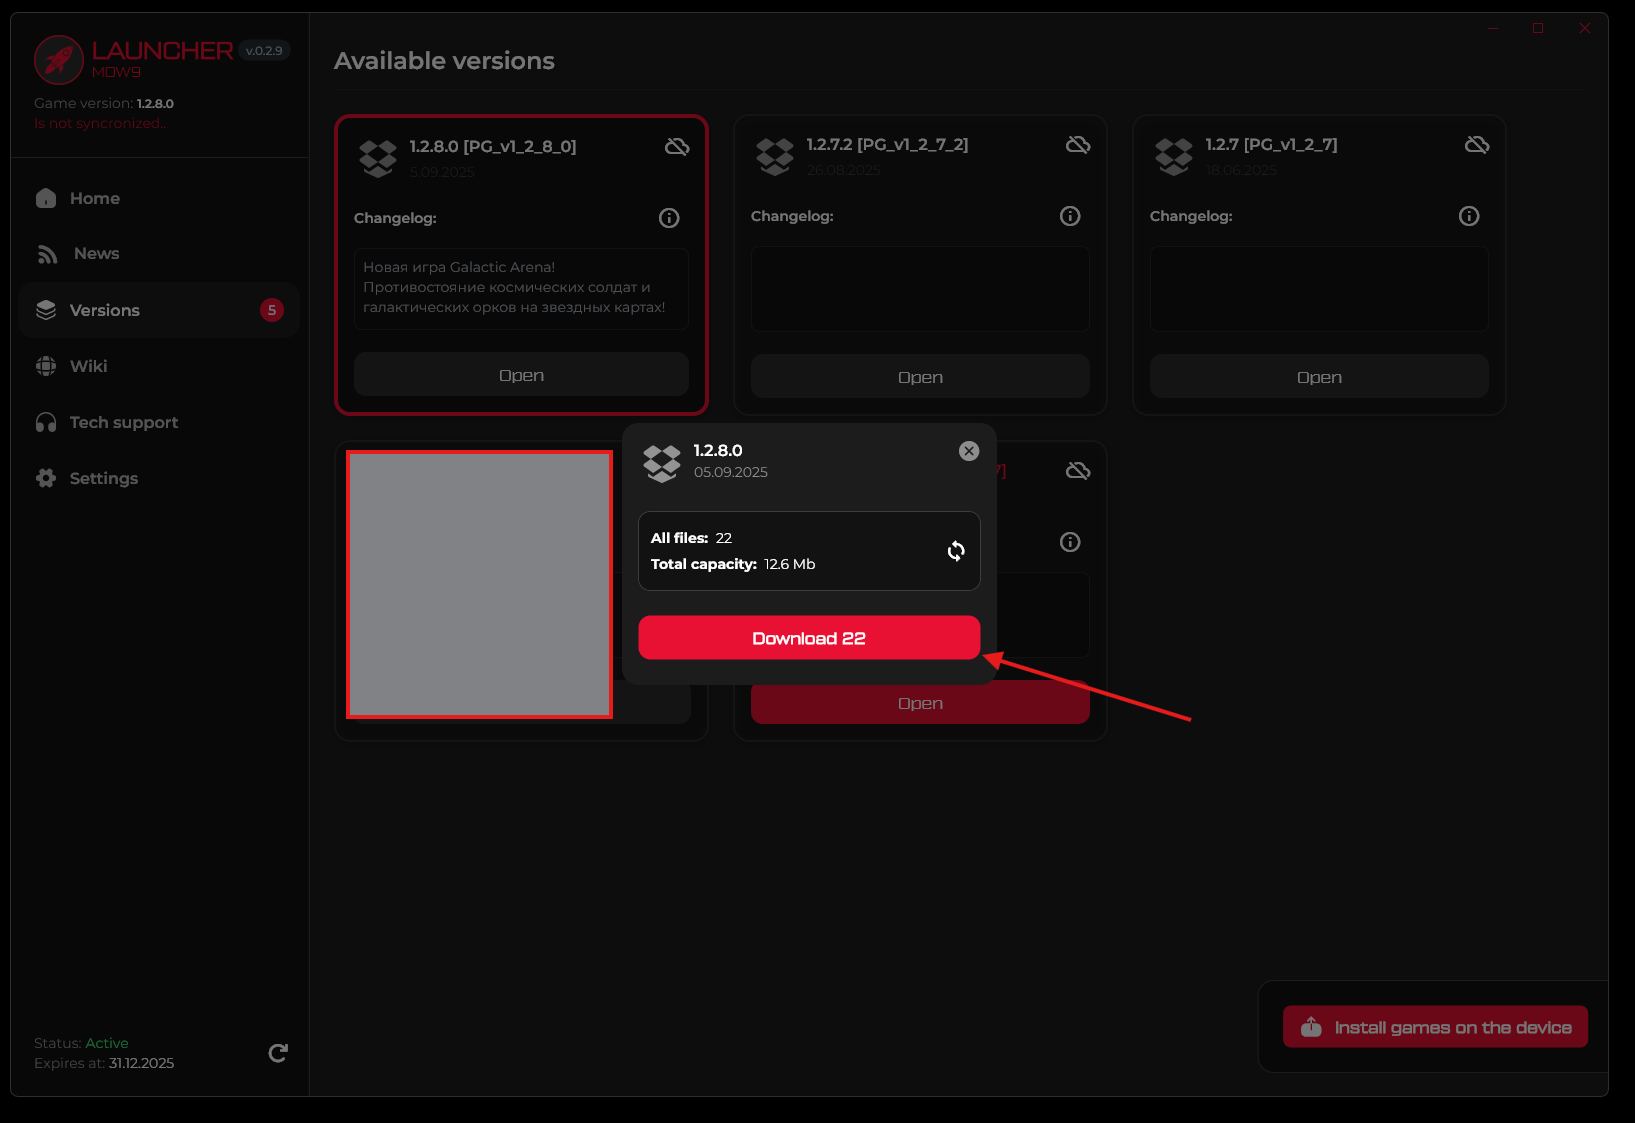
2. Version synchronization instructions:
1. Basic synchronization
Hover over the file folder and click the "Open" button
To sync the version, you need to download it to your disk.
To do this, click the "Download" button.
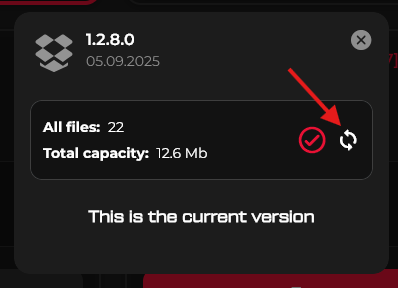
After the update is complete, a checkmark will appear in the top right corner. 
This means that the installation was successful.
⚠️ Important!
If the crossed-out cloud image.png is displayed in the upper right corner, it means that the version is not yet synchronized and synchronization is required.
Manual synchronization
If you have received a new build of the current update in the launcher (for example, 1.2.7.2):
- Go back to the game folder.
- Click on the arrow icon to re-synchronize
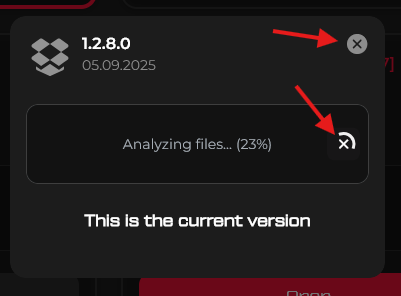
Canceling the sync
If you accidentally clicked on the arrow icon and do not want to update to the new build yet:
- Click on the cross in the download window
or
- Close the download window completely.
In this case, the sync will not occur.

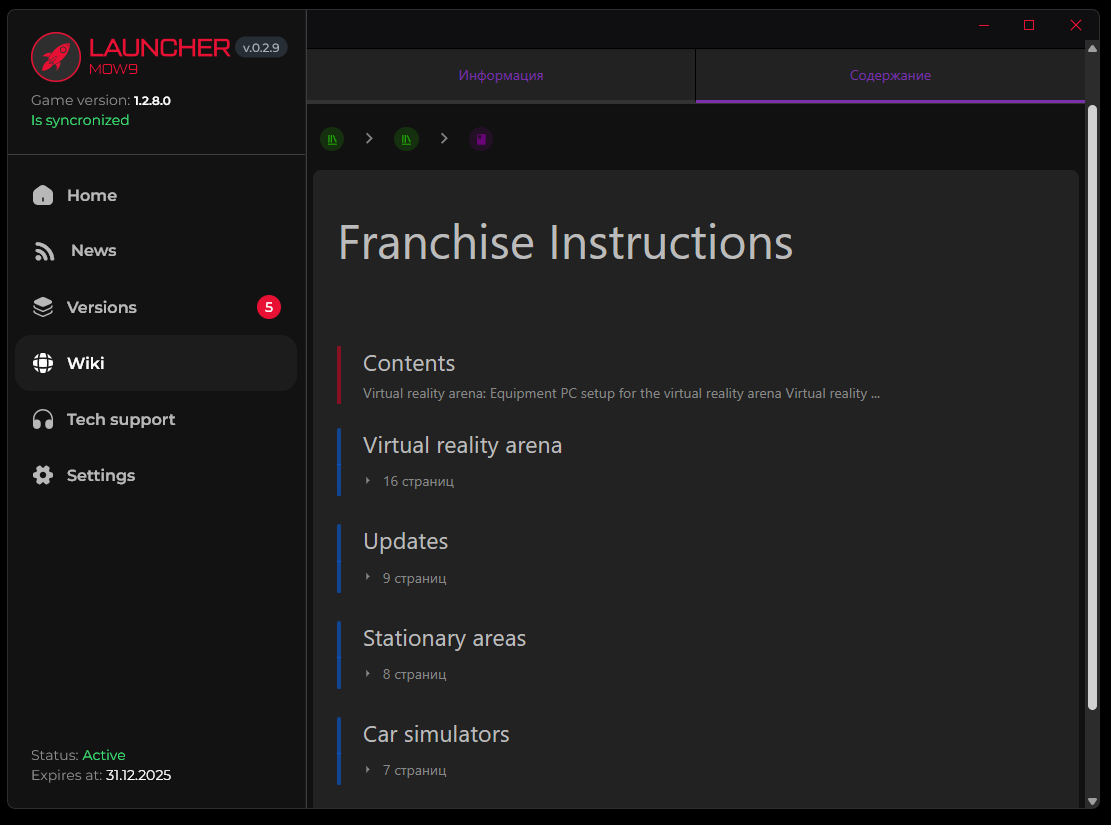
📚Wiki
No more switching to the website!
All useful information from Wiki is now available directly in the launcher, making it convenient and fast.
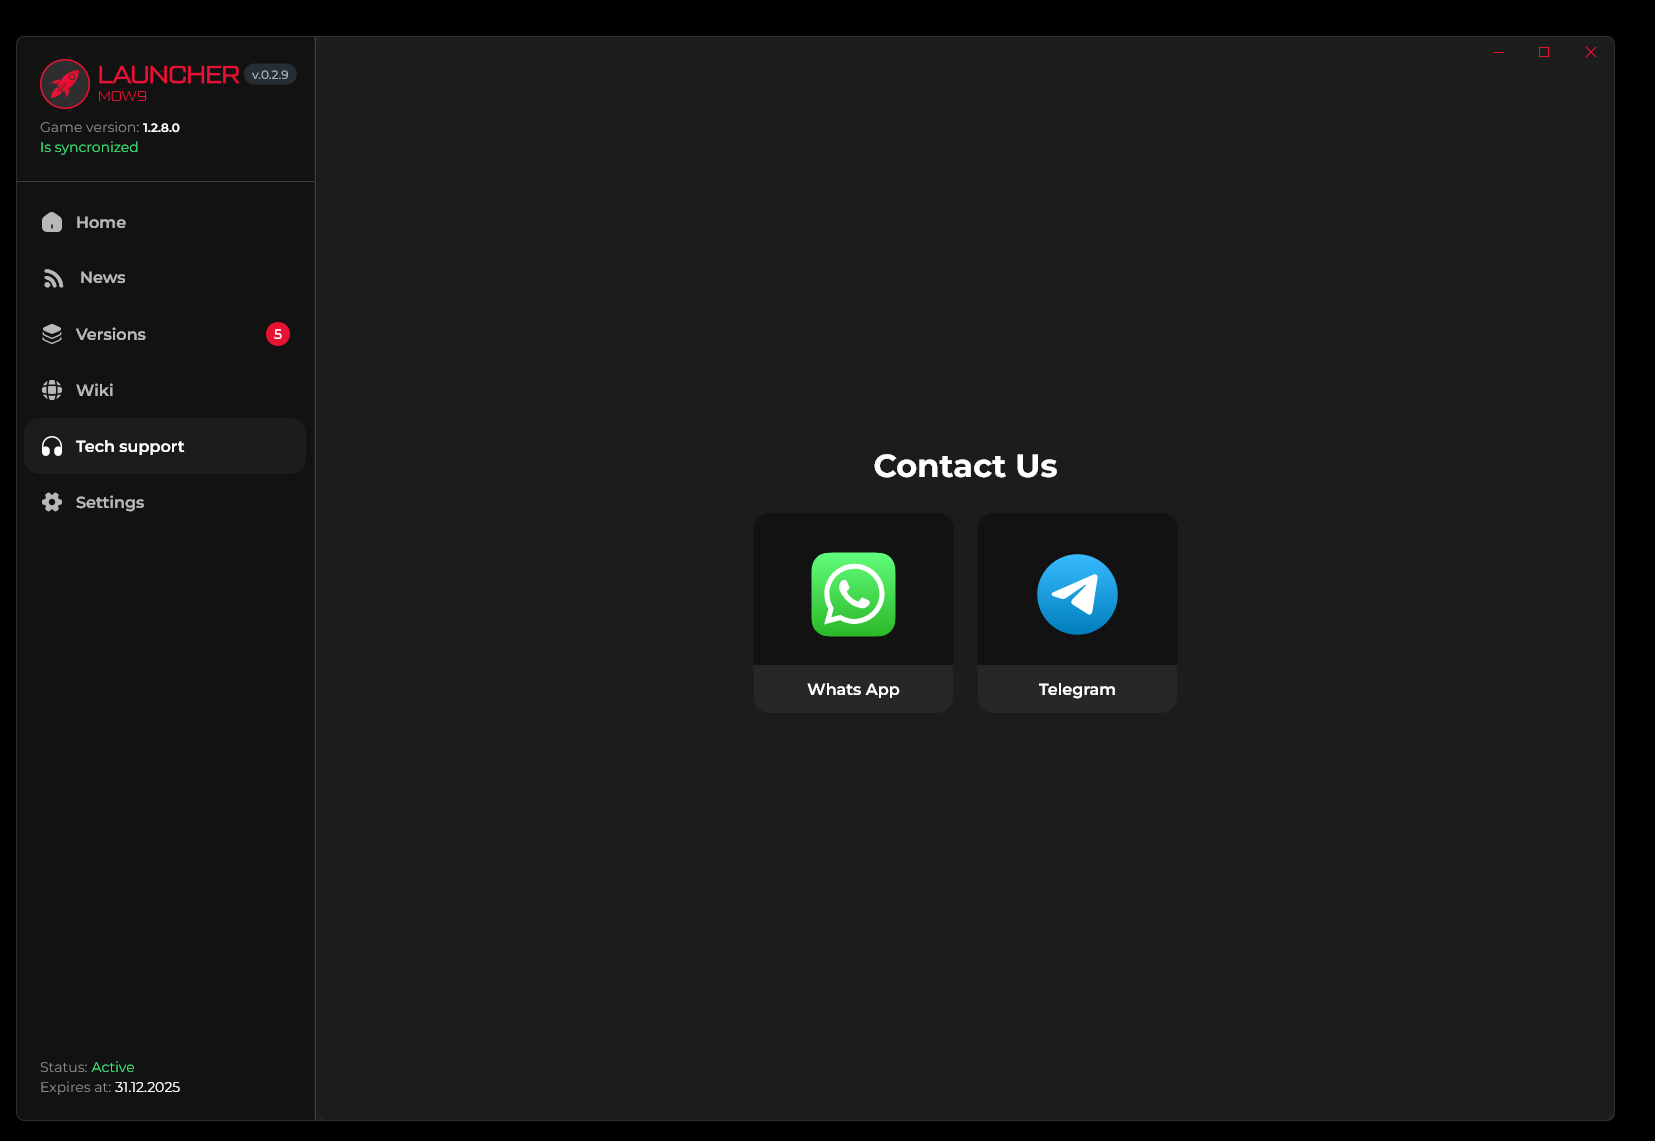
🚧Technical Support Section
At the moment, the app opens a Telegram bot for you to write messages to, which we receive in our technical support system.
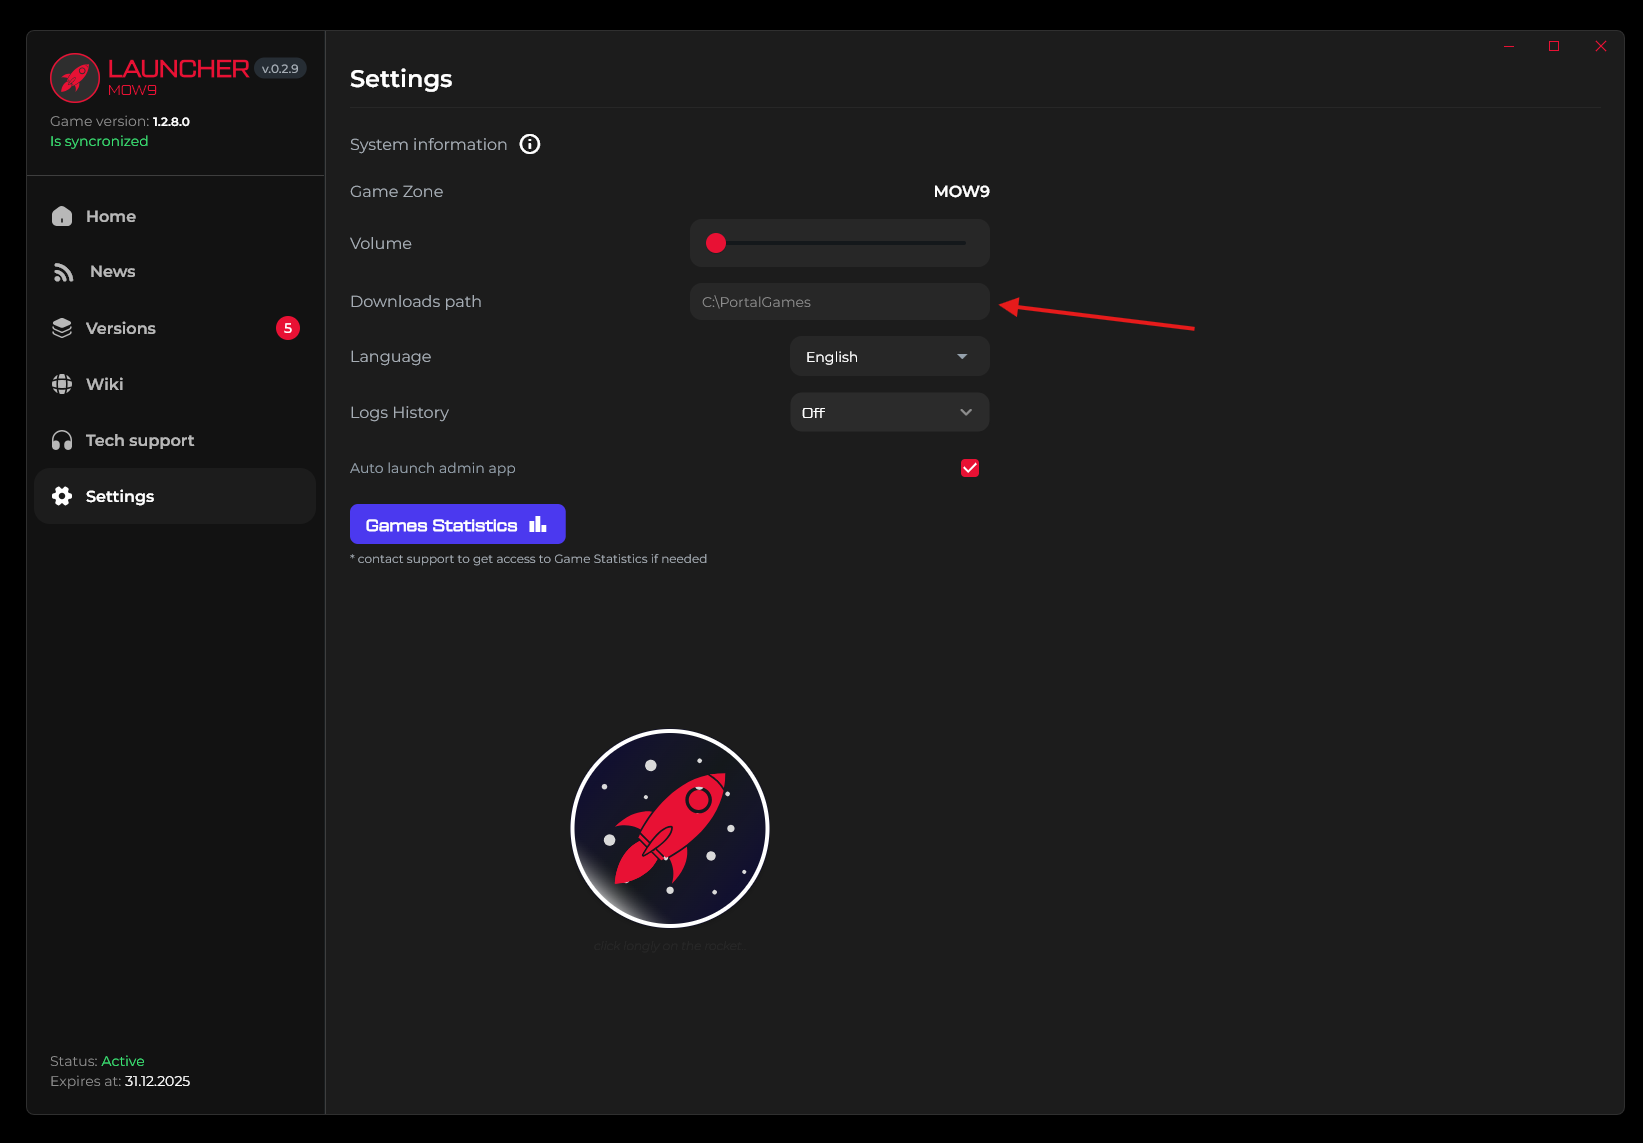
⚙️Settings

The download path is used to specify where you want to store the game files. By default, it creates a folder on the C drive.