
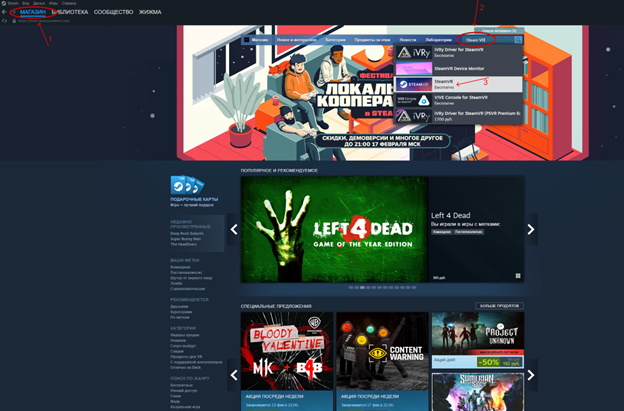
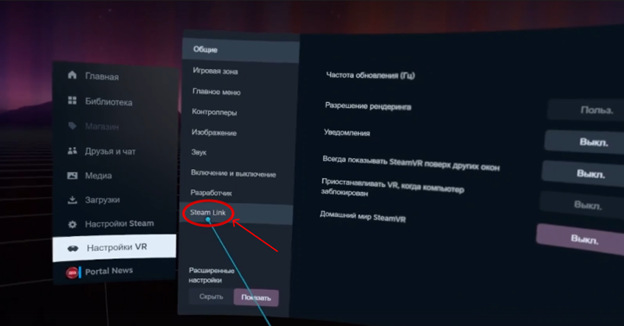
Steam Link
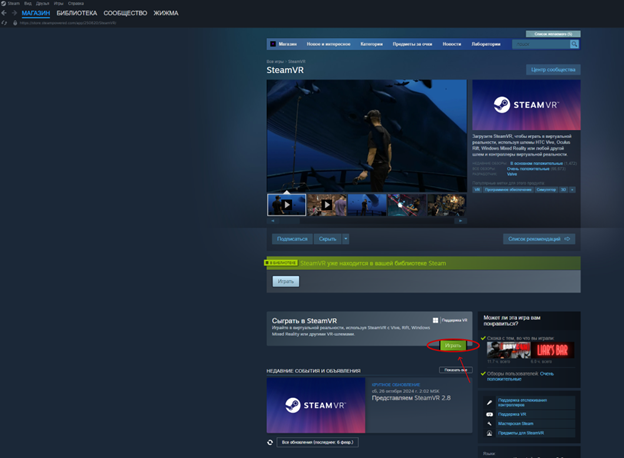
СкачиваемWe наdownload шлемеthe черезSteam магазинLink программуprogram on the helmet through the store, and on the computer we download the Steam Link,VR аprogram наthrough компьютереthe скачиваемSteam через магазин Steam программу Steam VRstore
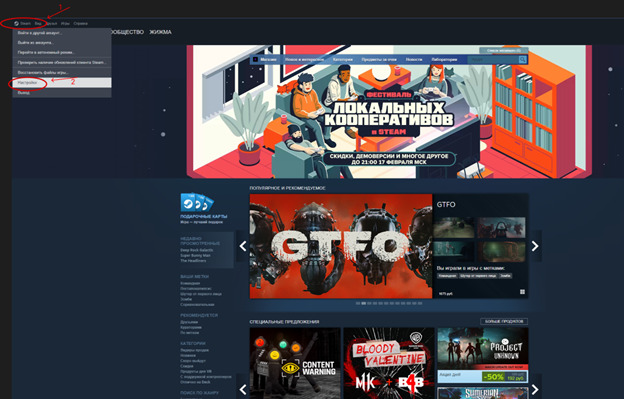
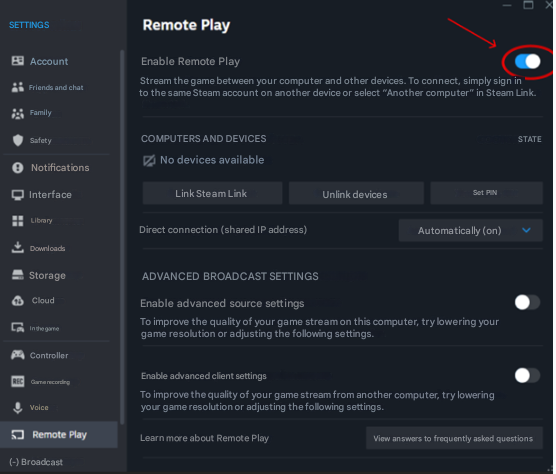
ПослеThen чегоon наthe компьютереcomputer заходимgo вto настройкиthe Steam иsettings выбираемand select Remote Play иand проверяемcheck чтобыthat этаthis настройкаsetting былаis включенаenabled
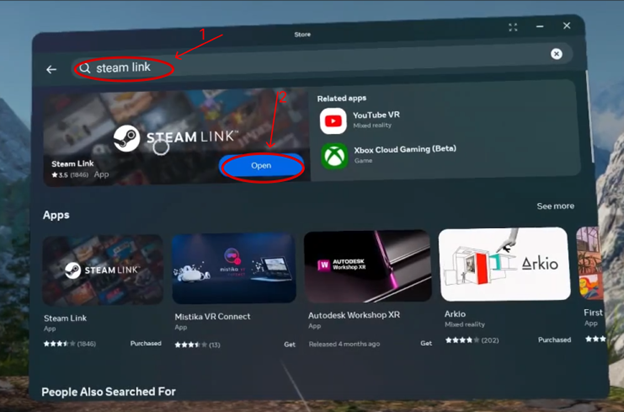
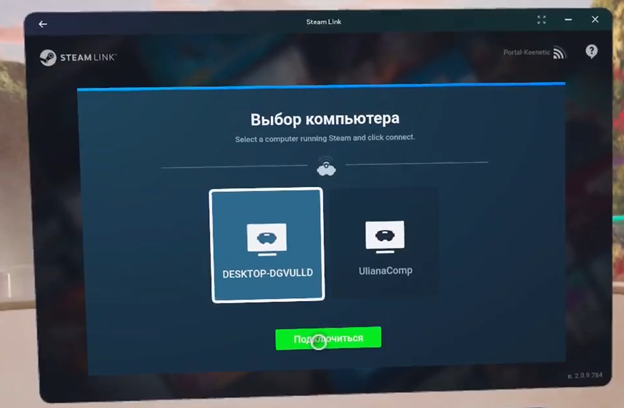
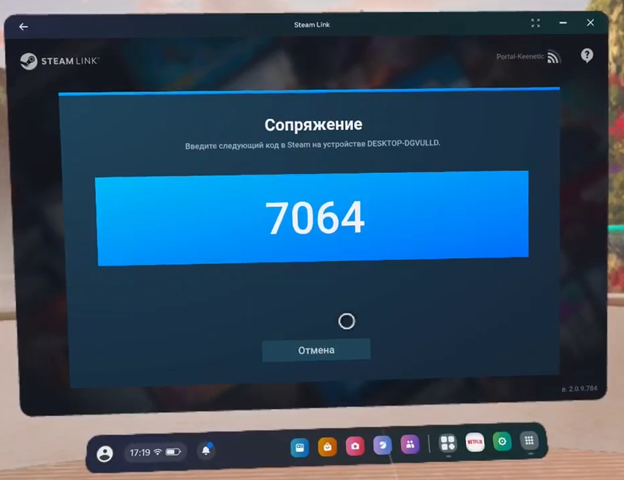
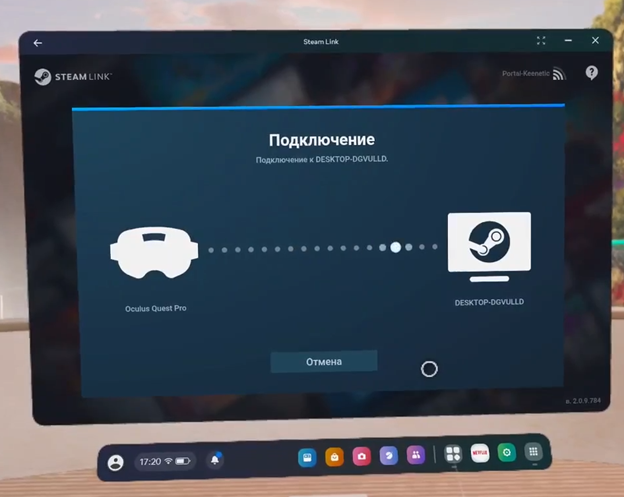
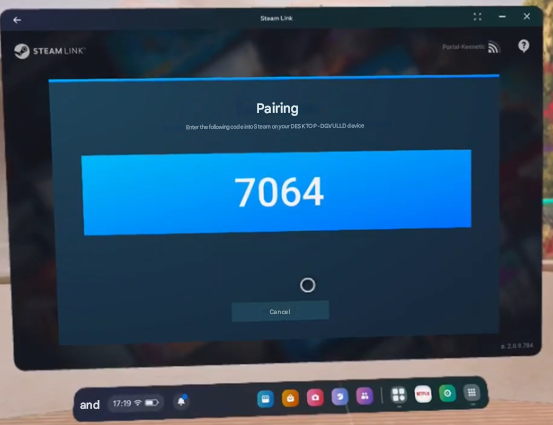
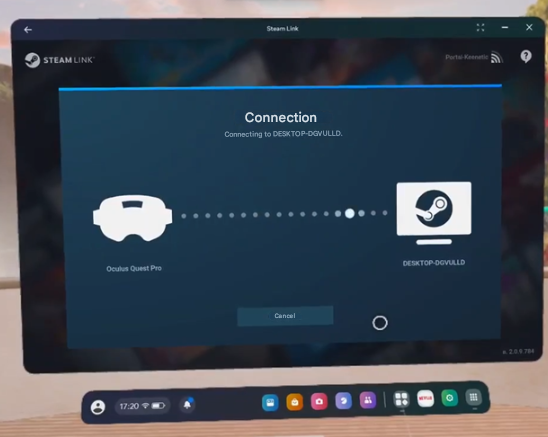
ДалееNext, вin шлемеthe запускаемhelmet, ранееlaunch скаченнуюthe программуpreviously Steam Link. В открывшемся окне вы должны увидеть ваш компьютер. Выбираем нужный ПК, нажимаем Подключиться, даем приложению все разрешения если потребуеться и в окне вы должны будете увидеть код подключения к ПК, а на самом компьютере окошко для вписывания кода. Вводим код со шлема на ПК и нажимаем продолжить, после чего подключение будет выполненно!
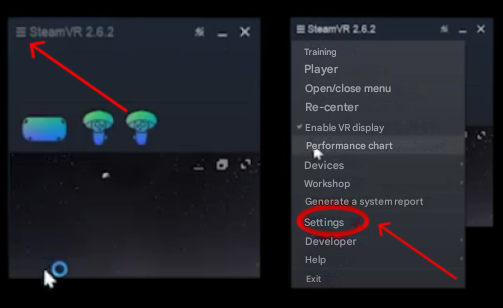
После чего заходим в настройки Steam VR на компьютере нажав на 3 вертикальные палки в левом верхнем углу окошка Steam VR
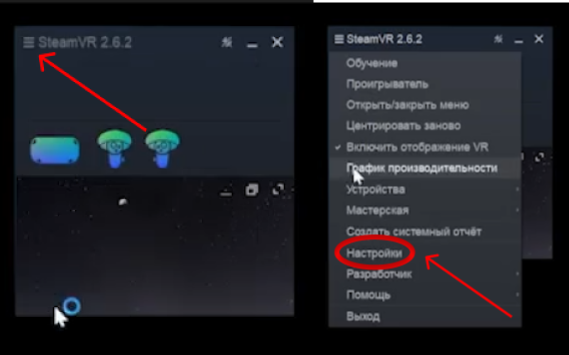
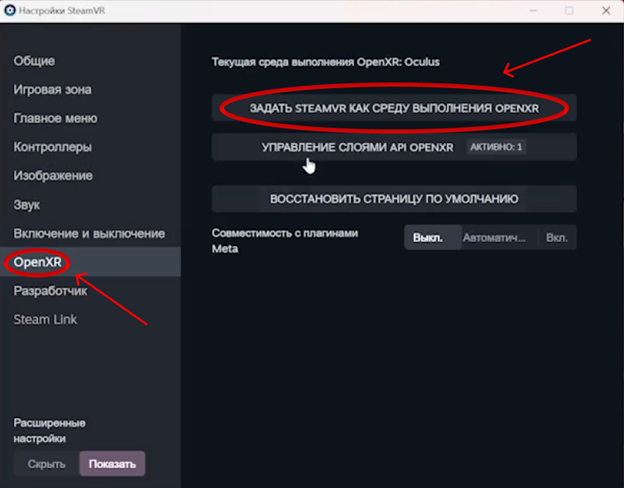
В открывшемся окне выбираем вкладку OpenXR и нажать на кнопку Задать SteamVR как среду выполнения OpenXR
После чего переходим в настройкиdownloaded Steam Link вprogram. шлемеIn the window that opens, you should see your computer. Select the desired PC, click Connect, give the application all permissions if necessary, and in the window you will have to see the PC connection code, and on the computer itself a window for entering the code. Enter the code from the helmet on the PC and click continue, after which the connection will be completed!

Then go to the Steam VR settings on your computer by clicking on the 3 vertical sticks in the upper left corner of the Steam VR window
In the window that opens, select the OpenXR tab and click Set SteamVR as the OpenXR runtime environment

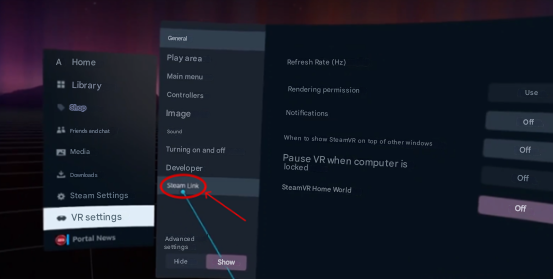
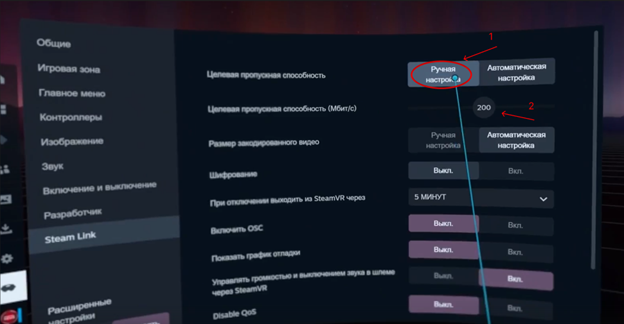
Then настраиватьgo битрейto чтобыthe картинкаSteam былаLink плавнойsettings безin дерганийthe helmet and go to adjust the bit rate so that the picture is smooth without twitching
Next, we turn the Target bandwidth item to Manual settings, and a slider will appear at the bottom, moving it to select the bandwidth so that the image is smooth without twitching!
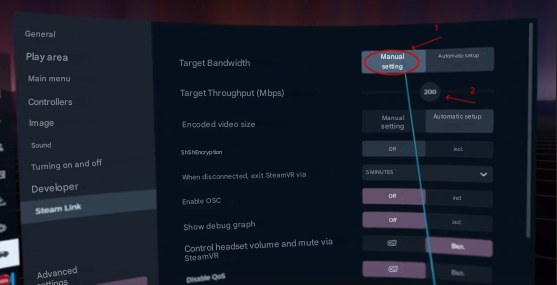
ДалееCongratulations! пунктConnecting Целеваяand пропускнаяconfiguring способностьSteam переводимLink вis Ручную настройку, снизу появиться ползунок, двигая его подберите пропускную способность так, чтобы картинка была плавной без дерганий!complete!
Your
Поздравляю!computer Подключениеand иhelmet настройкаmust Steambe Linkconnected завершена!to Примечание!the Компьютерsame иInternet шлем должны быть подключены к одной интернет сети!network!