
PC setup for the virtual reality arena
Technical specifications (minimum)
Here are the minimum specifications for the arena server PC. If possible, opt for higher-tier components.
Built with Intel:
- Processor -- intel core i5 12400f;
- Graphics card -- NVIDIA Geforce RTX 3060;
- RAM -- 16 GB;
- Storage -- 500 GB (Read and write speed should be no less than 3000 RPM.);
- Motherboard -- B-chipset with a network port bandwidth of 1 Gbps;
- Power Supply -- at least 500 Watts.
Built with AMD:
- Processor -- AMD Ryzen 5 5600X;
- Graphics card --AMD Radeon RX 6700 XT;
- RAM -- 16 GB ;
- Storage -- 500 GB (Read and write speed should be no less than 3000 RPM.);
- Motherboard -- B-chipset with a network port bandwidth of 1 Gbps;
- Power Supply -- at least 500 Watts.
Pre-configuration
- Format the hard drives on the gaming PCs and the admin PC during the preparation for installation Windows, это можно сделать на этапе выбора Where do you want to install Windows? delete all partitions and create new ones
- Install a clean operating system Windows 10 Pro
- Do not use custom Windows builds commonly found in internet cafés or gaming centers.
- We recommend using a Windows image downloaded from the official website or created using the Media Creation Tool от Microsoft or use alternative resources, such as https://uup.rg-adguard.net/. Instructions for creating the image are provided below.
- Complete the initial Windows setup by creating a local user account and setting a password before accessing the desktop.
- We also recommend setting a BIOS password to protect the PC from unauthorized access by changing the boot device.
- Install the games and applications that should be available to guests and the administrator on the PC. Antivirus software is prohibited, as it may negatively affect the performance of essential software.
- This step can also be carried out after software installation in technical mode.
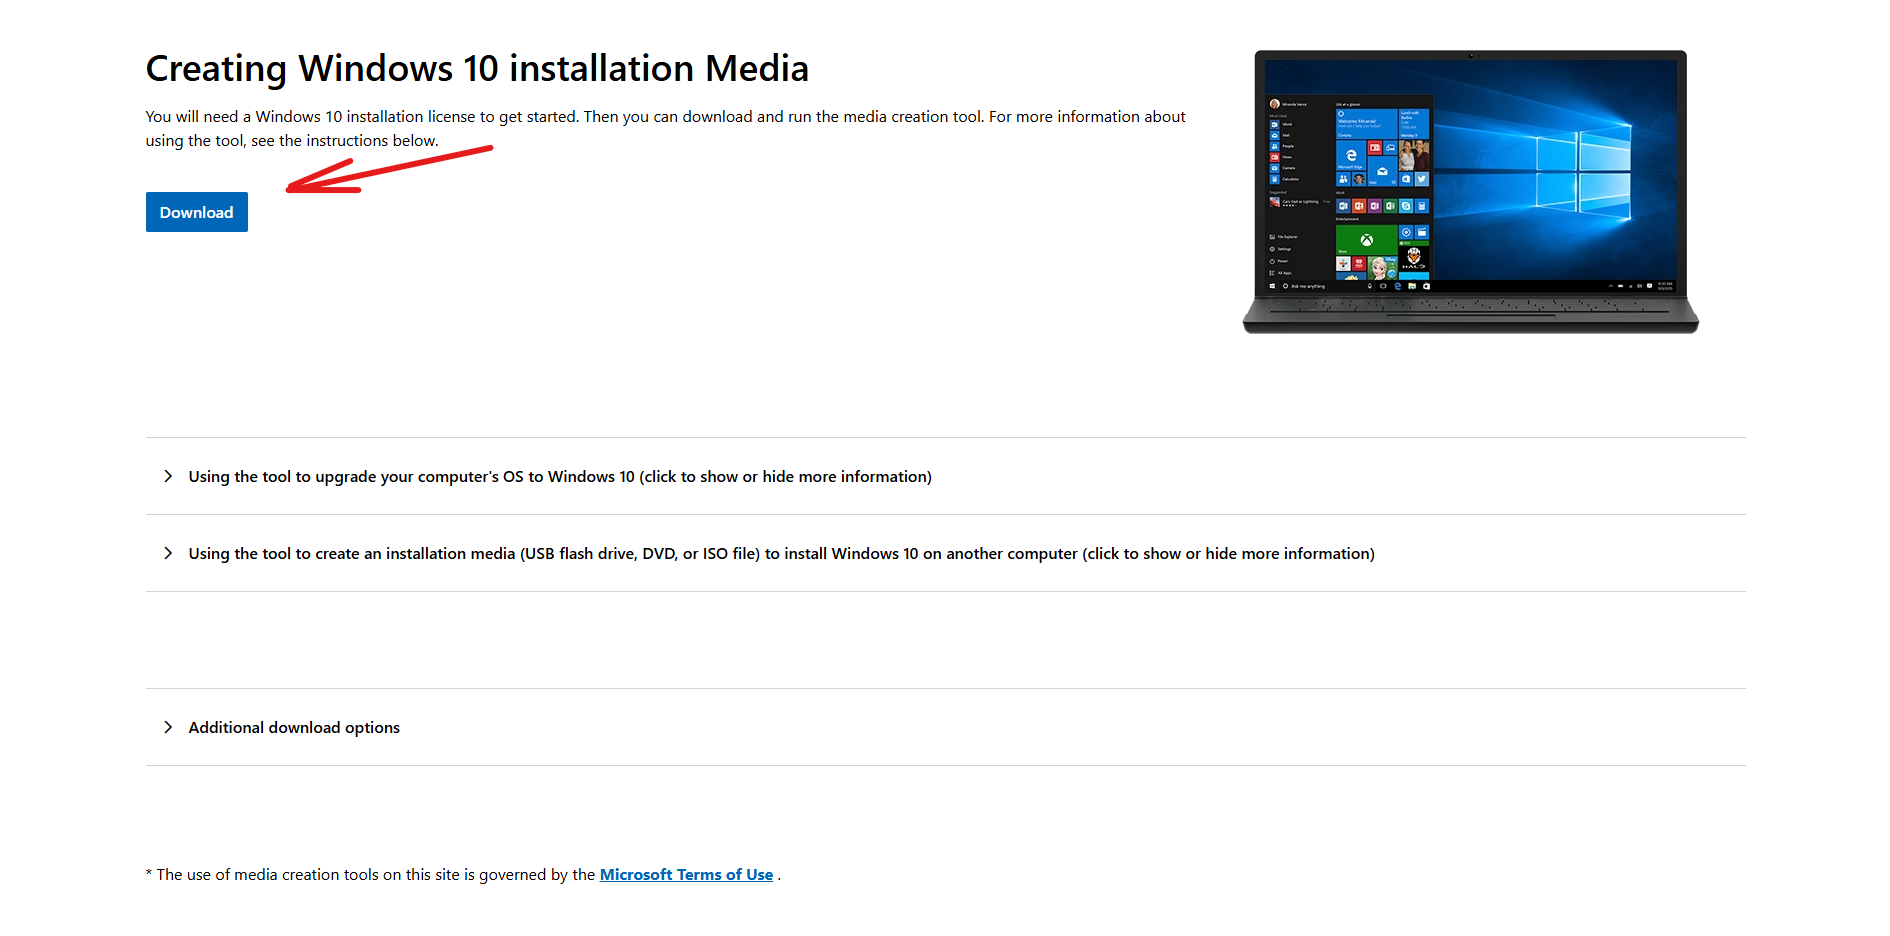
How to create an image Media Creation Tool
- Open the website https://www.microsoft.com/ru-ru/software-download/windows10 and download it from there MediaCreationTool
-
Insert the flash drive
-
After downloading, run MediaCretionTool and wait for the preparation to finish.
-
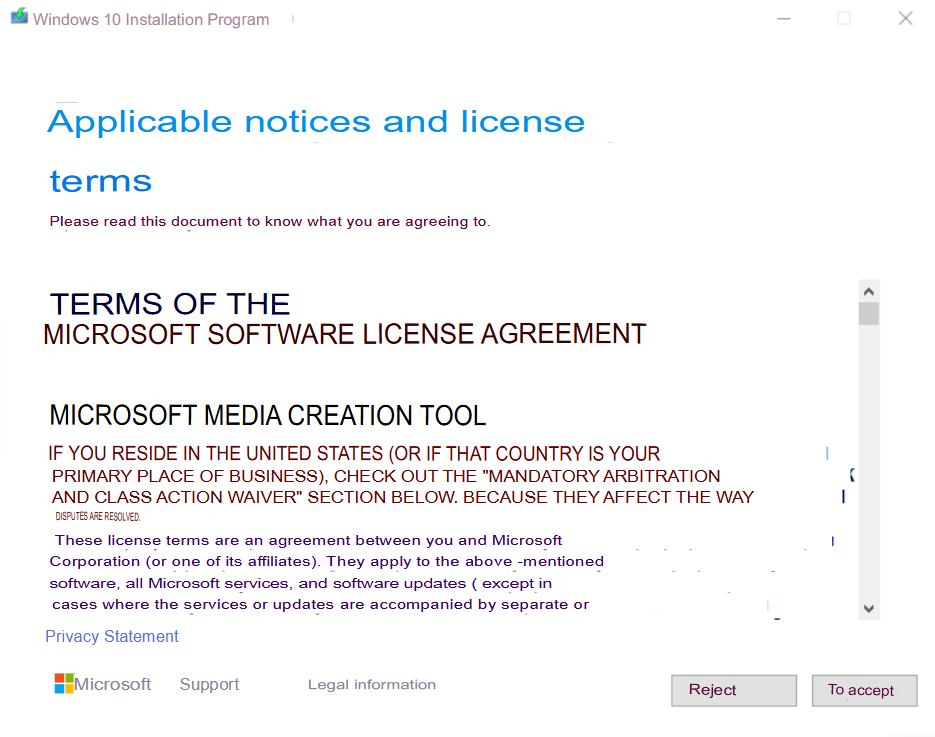
Next, accept the license terms

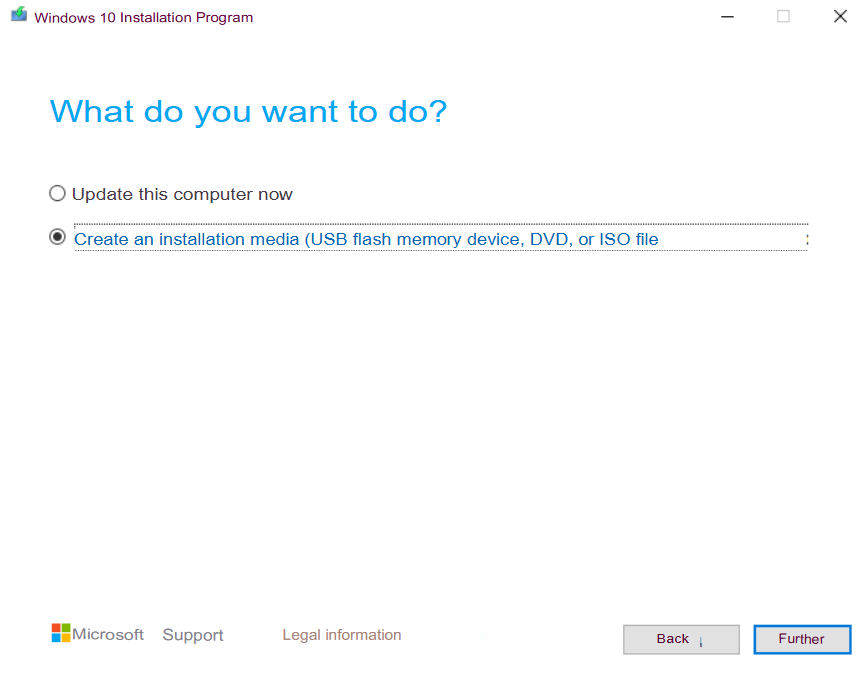
- Select the option Create installation media

-
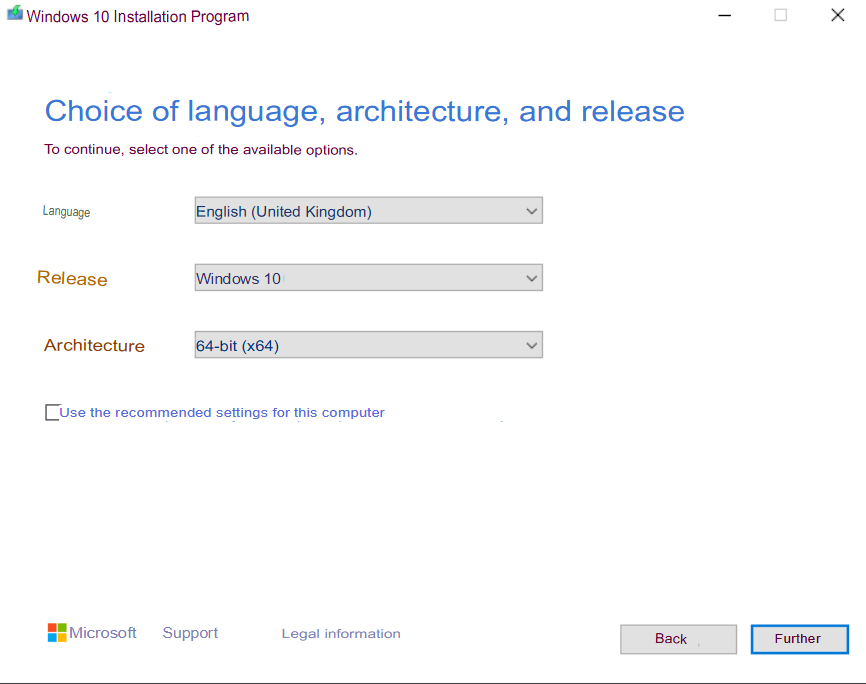
Uncheck Use the recommended options for this computer and select the desired language, edition, and 64-bit architecture.
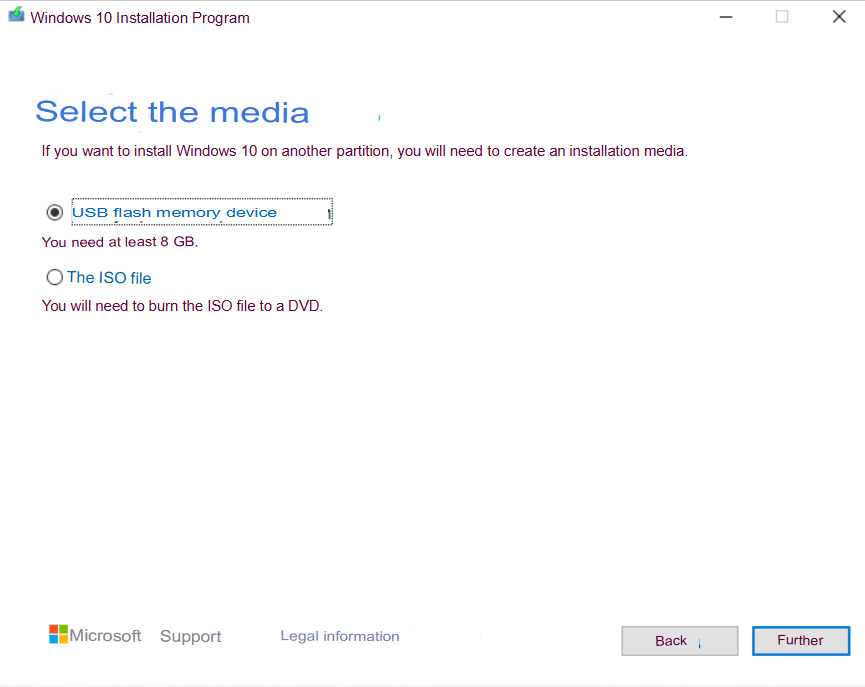
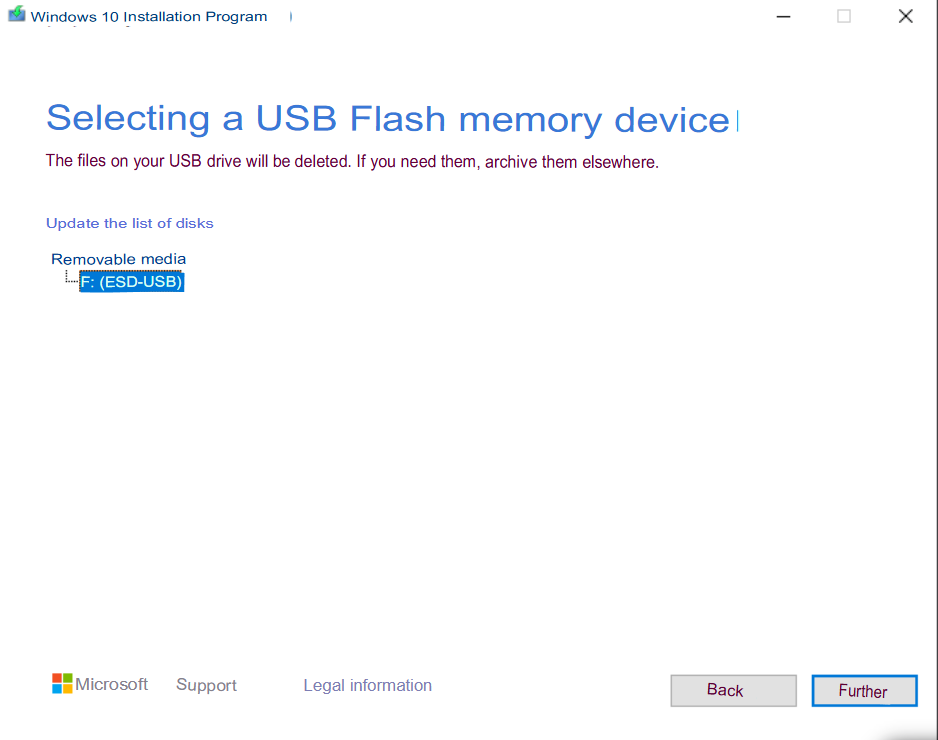
- Choose a USB device Flash memory
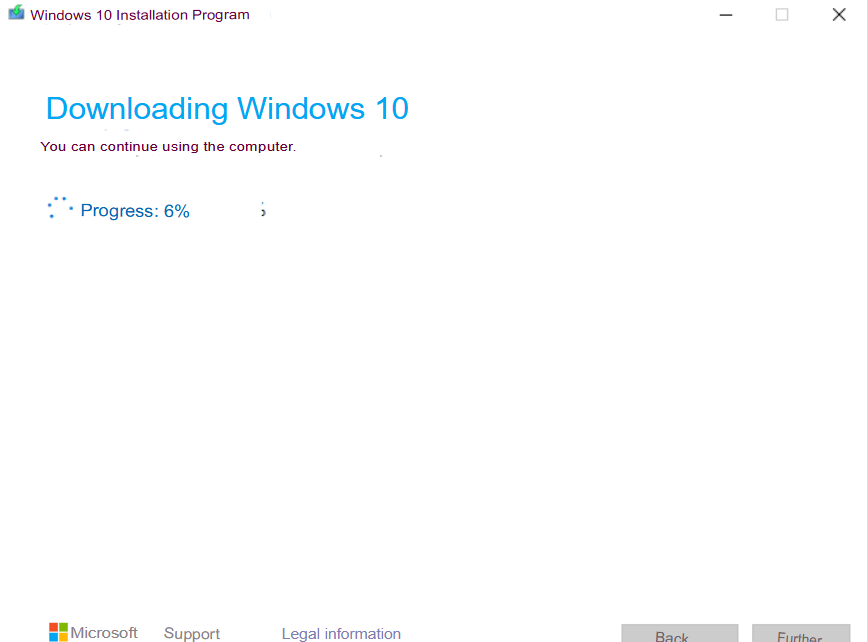
- We are waiting for the preparation to be completed. It may take some time. Then select the desired flash drive and click Next

- Next, we are waiting for preparing the image and writing the image to your flash drive


Install all updates using the built-in Windows Update
- Right-click the icon Start and select from the menu item Options or press the Windows keyboard keys and I (Bus)simultaneously
- Selecting an item Update and Security the Windows Update window opens and check if there are any updates by clicking on the button Check for updates install all updates and follow the prompts of the operating system – you need to restart after the installation is complete.
- After rebooting, go back to Update and security, click the Advanced Settings button in the update options, turn on the item When updating Windows, get updates for other Microsoft products and go back to the item Update and security.
- Re-check for updates by clicking on the button Check for updates, install all updates.
- We check if there is an item View optional updates if available under the button To check for updates, then click on the blue label View optional updates and add them to Optional updates all check boxes next to drivers and other updates, and there will be a Download and Install button at the bottom.
- We check if there is an item View optional updates if available under the button To check for updates, then click on the blue label View optional updates and add them to Optional updates all check boxes next to drivers and other updates, and there will be a Download and Install button at the bottom.
- Install updates until the following message appears You have all the latest updates installed and when you click on the button Check for updates no updates appear
- Suspend Windows updates for the maximum period of time by clicking on the button Suspend updates for 7 days the maximum possible suspension period is 35 days
- At the end of this period, it is recommended to update Windows again by clicking on the Resume Updates button and after updating, suspend updates for 35 days.
Disabling Windows Security System
- Right-click the icon Start and select from the menu item Options or press the Windows and I keys simultaneously on your keyboard
- Selecting an item Update and Security the Windows Update window opens, select Windows Security on the left and click on the button Open the Windows Security Service
- In the window that opens on the left or in the center, select Protection from viruses and threats
- Finding the item Settings for protection against viruses and threats and click on the label Managing settings
- Disable the Real-time protection option
- Turning off items Cloud Protection, Automatic sample Sending, Anti-counterfeiting
- At the bottom, we find the item Notifications and click on the label Changing Notification Settings
- We turn off all notifications using radio buttons, such as Receive informational notifications, Receiving notifications about account protection, Notify when the Microsoft Defender firewall blocks a new app
- On the left side of the menu, select the item Firewall and network security, select Turning off the domain network Microsoft Defender Firewall
- On the left side of the menu, select the item Firewall and network security, select Private network and turn it off Microsoft Defender Firewall
- On the left side of the menu, select the item Firewall and network security, select Turn off the public network Microsoft Defender Firewall
- On the left side of the menu, select the item Manage applications/browser, in the item Reputation-based protection, click on the blue text Reputation-based protection options, turn off the item Checking apps and files, SmartScreen for Microsoft Edge and SmartScreen for apps from the Microsoft Store
Editing Windows Group Policies
- Press the keys on the Windows keyboard and R to open the dialog box To perform. Here, type: gpedit.msc and press Enter or OK to open the Group Policy editor
- Go to Administrative Templates, Windows Components, and the Microsoft Defender Antivirus Program
- Finding the item Turn off the Microsoft Defender antivirus program, double-click and select in the window that appears Enabled and confirm OK
- It is important to select enabled, since the item implies enabling disabling antivirus protection according to the Windows logic
- Find the item Protection in real time, double-click and search for the item Disable real-time protection
- It is important to select enabled, since the item implies enabling disabling antivirus protection according to the Windows logic
Disabling alerts
- Click the Start icon and start writing Security and Maintenance Center, the search will return Security and Maintenance Center click Open
- On the left side of the menu, select Change the settings for the Security and Maintenance Center component
- Uncheck disable all available message types and click OK
Power Management – high performance
- Tap the icon Start and write: Power supply search will return Selecting a power management scheme in the menu that opens, click on the label Show additional diagrams and select the item High performance
- To the right of the label High performance click on the blue text Power Supply Circuit Setup
- In the parameter Disable display select Never and Save changes
- If the club has hard drives installed on gaming PCs, then click on the blue text that says Change advanced power settings and in the section Hard Disk - Disable hard disk via select 0 and click OK
- If the club has hard drives installed on gaming PCs, then click Start and write: Optimization and search will return Optimize disks and click Run as an administrator, find the item Change the settings and uncheck all the boxes to disable optimization, then click OK
Setting the PC name
- Right-click the icon Start and select from the menu item System
- Find the button Rename this PC click on the button and come up with a name, for example PC1, since the name must be in English
- Confirm the procedure by clicking Then, when prompted to restart, perform it.
Setting the static IP address of the PC
- Press the keys on the Windows keyboard and R to open the dialog box Run, enter: ncpa.cpl and press Enter or OK
- Double-click on the desired network adapter (check the speed of the adapter, the recommended network speed in the computer club is 1 Gbit / s) and click Intelligence
- Write down or remember the values in the network connection information:
- IPv4 address - for example, 192.168.1.99
- IPv4 subnet mask - for example 255.255.255.0
- The default gateway is IPv4 – for example 192.168.1.1
- IPv4 DNS server - for example 192.168.1.1
- Close the window with the button To close
- At the bottom, click on the Properties button
- Find IP version 4 (TCP /IPv4) in the list and select it then click Properties
- Select an item Use the following IP address and fill in the fields:
- The IP address is the IPv4 address from clause 10.3.1
- The subnet mask is the IPv4 subnet mask from clause 10.3.2
- The primary gateway is the IPv4 default Gateway from clause 10.3.3
- The preferred DNS server is the IPv4 DNS server from clause 10.3.4
- Sometimes, for different games and applications, you need to put the Google DNS IP addresses 8.8.8.8 and 8.8.4.4, respectively, in the preferred and alternative DNS servers.
- Save your changes with the OK button
- Close all open network settings windows with the button To close
- Check the network and Internet on your PC by going to the browser
- Restart your PC and check the Internet availability again
Installing NVIDIA or AMD drivers
- Specify the video card model in your PC
- Go to the website of the video chip manufacturer NVIDIA or AMD:
- https://www.nvidia.com/ru-ru/geforce/geforce-experience/ - the site will have a green button Download, after downloading and running the file, the GeForce Experience application will be installed, through which you can update drivers, it is recommended to create one NVIDIA account to log in to the application. This app makes it easier to update drivers.
- https://www.nvidia.ru/Download/index.aspx?lang=ru – on the site, you will need to select the video card Type, Video card Series, and Video card Family and click the button Search, after opening the page, click on the Download Now button, after downloading and running the file, you will be prompted to unpack the archive and then the installation will start with the choice to install only the driver or the driver with GeForce Experience. NVIDIA Instructions
- https://www.amd.com/ru/support - the site will have a Download Now button after the text Automatic search and installation of driver updates for Radeon graphics and Ryzen chipsets for Windows after downloading and running the file, you will be prompted to unpack the archive and a window will appear with the driver selection, it is recommended to install the driver with the inscription Recommended Driver. the program will download and install the update itself. AMD Instructions
- Restart your PC after installing the graphics card drivers
Files for enabling and disabling updates
Download the files from the desktop link: off-all and On-update
-
- OFF_all – .BAT file that replaces the Windows update server so that Windows does not find updates for the operating system + disables various operating system parameters through the registry that interfere with the optimal operation of the gaming PC. Also, this file provides you with the basic configuration, below are all the settings that it performs, after applying it, you can check whether everything was applied correctly for you.
- An ON-update file that returns the standard Windows update settings
- Go to the folder where the files were downloaded (desktop) and right-click on the OFF_all file and run as administrator
- Double-click on the OFF_all file and agree to the change in the registry with the Yes button
- Windows prompts you to reboot to apply the changes to the system
- Restart Windows
It is strictly forbidden to install third-party software, especially all VPN options are prohibited
There should be three main programs running on the server computer: Anydesk, 7Zip, Game Archive