
TestMesh
ыЫThis stage is designed to avoid misalignment of physical and virtual space. On it, we get a drawing of your arena zone from you and draw out a layout that will be used to build a test map for testing. The Test map takes 3 days to complete, and then edits are made to adjust the layout.
After you have received the c archive with the name "TestMesh_x. x.x. xxx", you will need to unzip it (We recommend using the 7Zip program), install it on your helmet, and check all the walls and columns for the correct location.
Let's take a step-by-step look at everything:
1) What we send you when TestMesh is ready:
First of all, you will receive a link to the archive and calibration plan
What do you see in this plan:
- City name
- Its abbreviation in our project
- Comments that indicate each color, as well as hints about where the first calibration point is located and which direction to go for the second point.
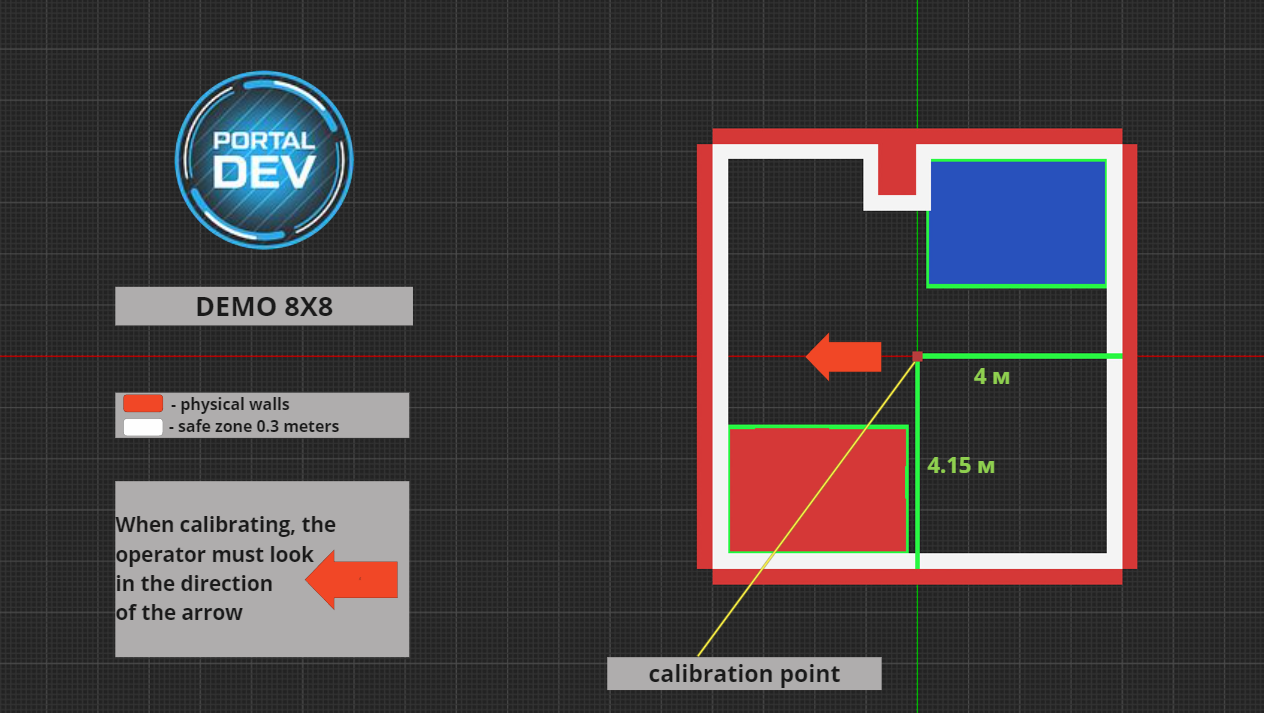
In this case, you can see that the first calibration point is located at a distance of 1 meter and 10 cm from the column, and the calibration of the second point will take place to the right of this column. Important point in calibrating the second point: Try to make the distance larger than one meter for maximum calibration accuracy.
The first point fixes the center position, and the second point fixes the rotation of the map relative to space.
2) Downloading and unpacking the Archive:
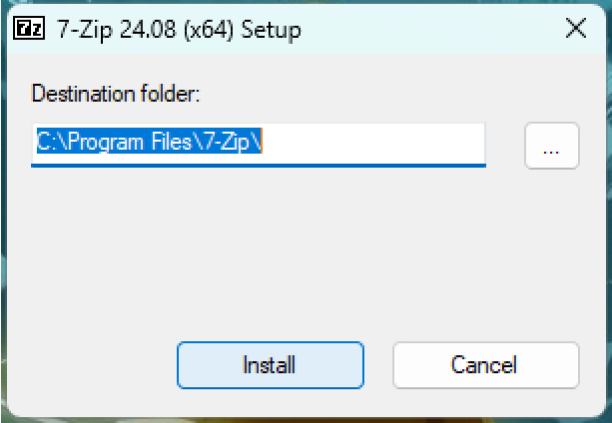
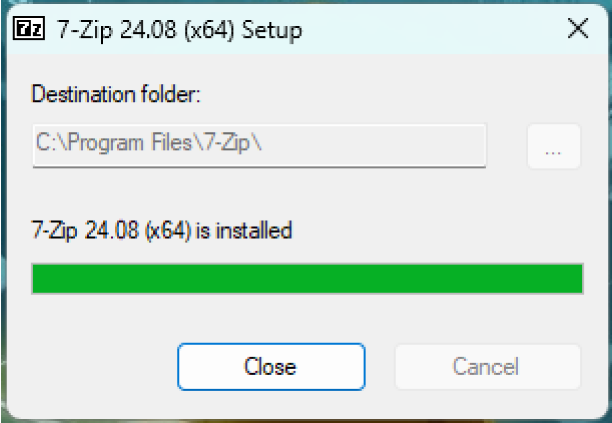
After you have been sent a link, you need to download the archive and unpack it, below we attach a link to our unzipboxer (7Zip).

Go to install 7Zip:
Installation takes place in two clicks.
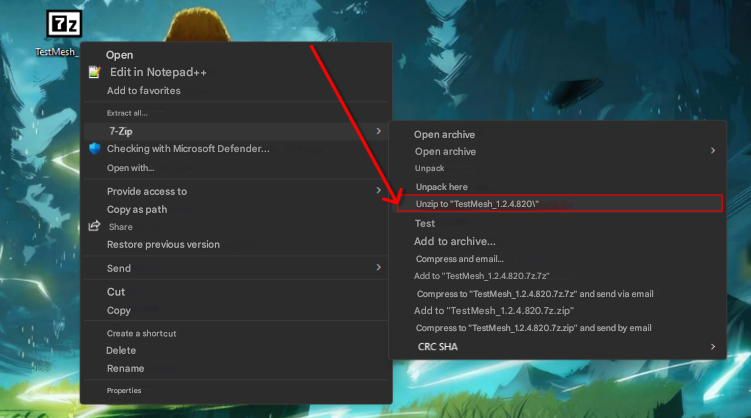
Unpacking the archive, click on the PCM archive and select Unpack to " TestMesh_x.x.x. xxx\"
3) Installing a test card on a virtual reality helmet
After you have unpacked the archive, you will see the following folders::

To install a test card on your helmet, you need to:
- Connect the helmet to a computer running on a Windows system (Windows 10 or Windows 11);
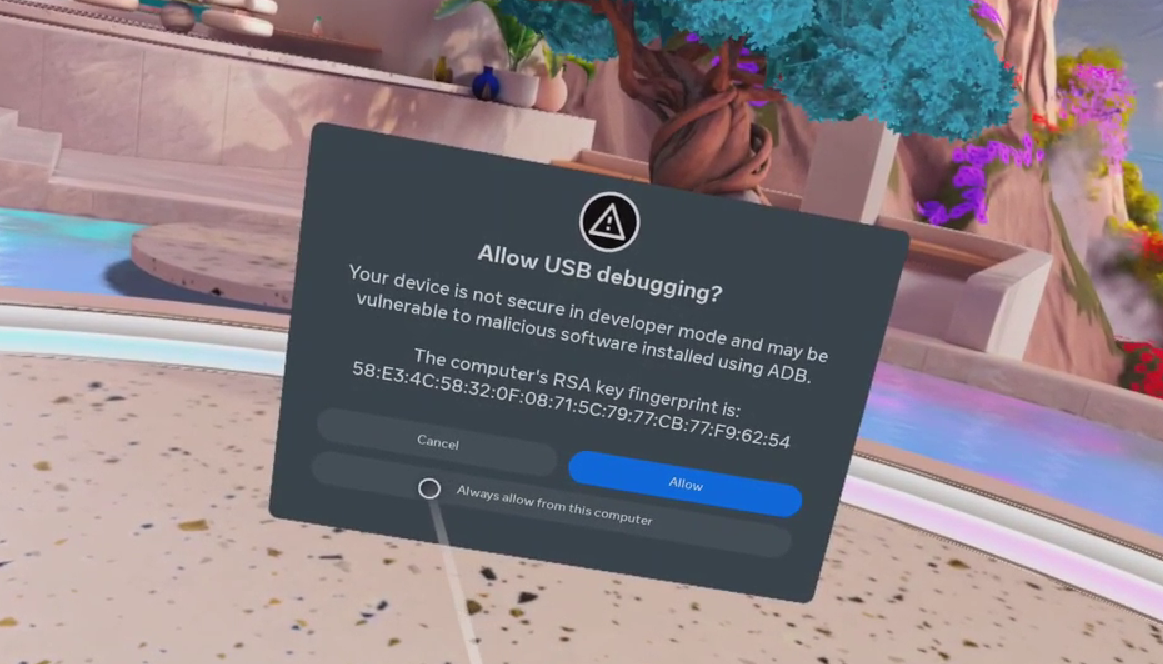
- In the helmet, give permission to connect;
- Open the folder you need, depending on your helmet (Meta/Pico);
- Run the install file Instal.bat, you will see the installation window open;
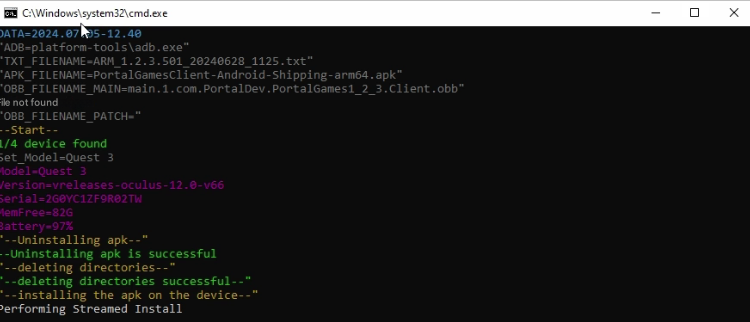
Wait for the installation window to close AUTOMATICALLY.
Possible installation errors:
No connected devices
There may be several reasons:
- You don't use a high-quality wire to connect your helmet to your computer;
- You didn't give permission to connect your helmet;
- You haven't enabled Developer Mode or USB Debugging (See Configuring helmets).
The installation window closed, but the application did not install.
Most likely, your ADB files are buggy. To solve this problem, the Kill_adb file is located in the folder.bat run it and try installing it again.
4) Launching a test card from your helmet
After successful installation, your content will be located in the" Unknown Sources " of the virtual reality helmet, called PortalGames_x_x_x. Open this file and you will be taken to the main menu of the test map.
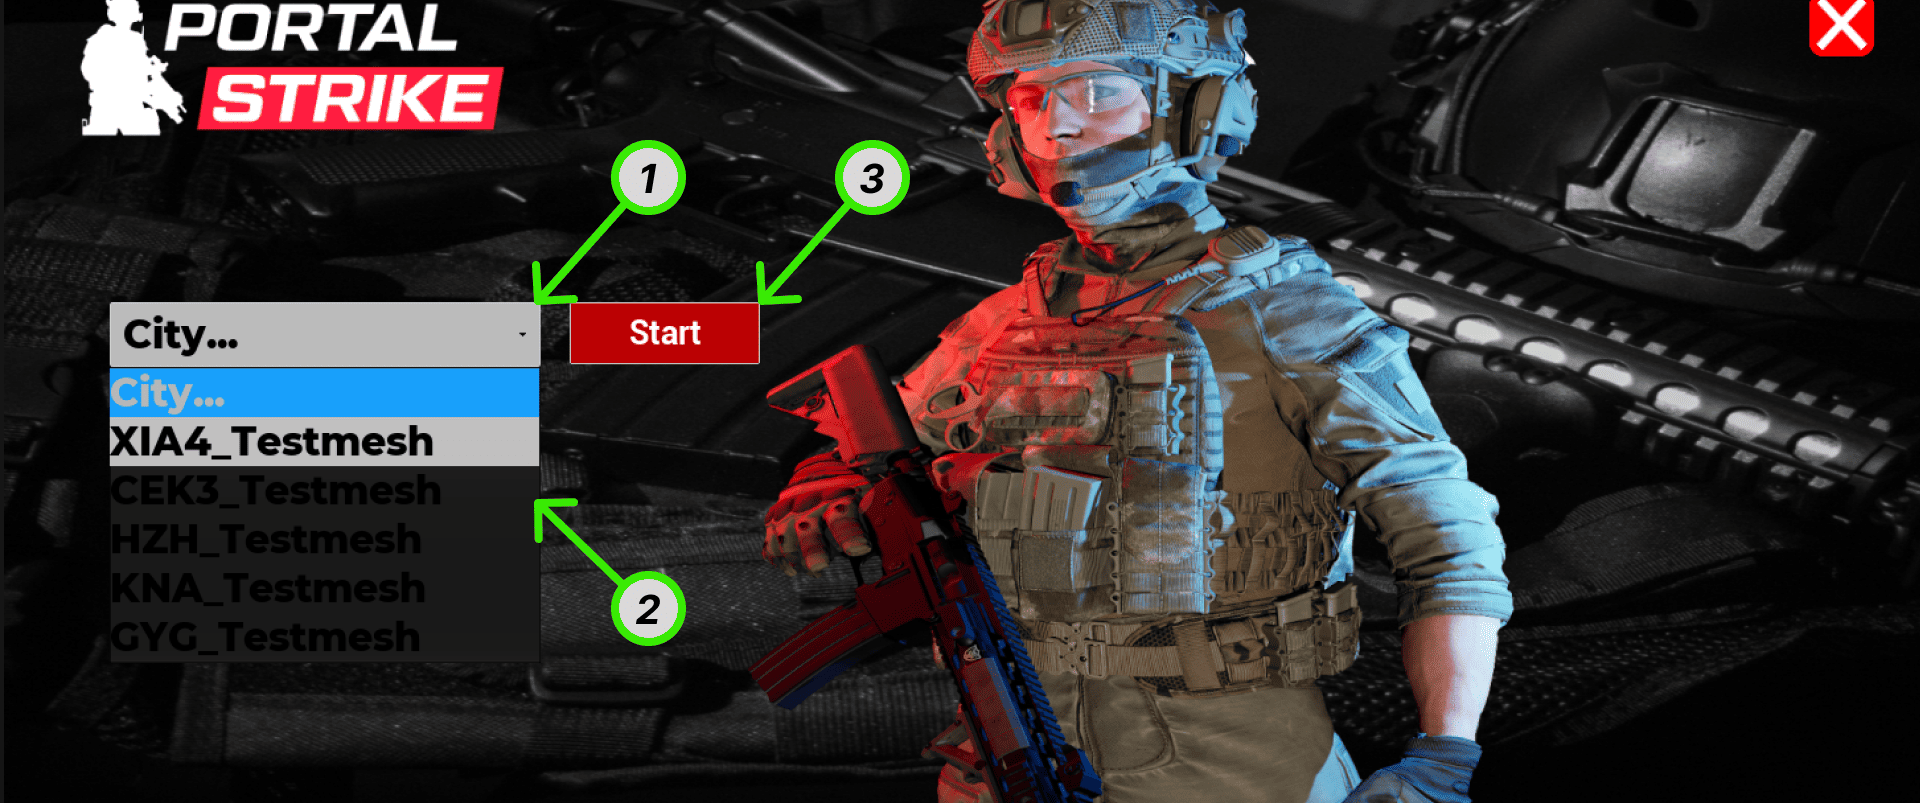
To launch the map, you will need three steps::
- Expand the list of all maps uploaded to the archive;
- Choose with your abbreviation;
- Click the "Start" button to open the map and you will only need to calibrate.
When checking your test map, keep in mind that the white wall border (Buffer Zone) should end 30 cm from the actual wall, and the red wall borders should end close to your actual wall.