
Setting up Virtual Reality Helmets
Meta (Oculus)
Preparation
Before setting up a virtual reality helmet, unpack it and remove all the films that come from the factory.
Install the Meta Horizon app from the app store on your smartphone (Google Play | App Store).
Any action with Meta should only take place under a VPN, otherwise the app will not work for you. For more information on how to set up a VPN, see below.
VPN
Go to setting up a VPN on all our devices.
The video explains how to set up a VPN on different routers.
Helmet Activation
- enabling the helmet for initial configuration
- follow the steps in the helmet until you select a Wi-Fi network
- connecting your helmet to Wi-Fi with a VPN
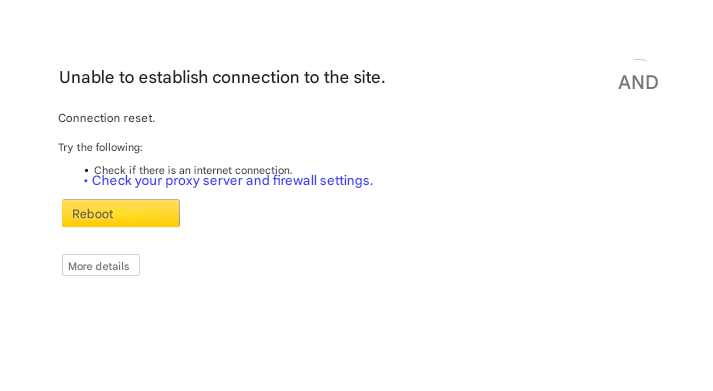
- check that the update download has started. If the update is set to 0% for a long time and shows a Bad Internet connection, it means that your VPN is not working. To check how it works, connect to a Wi-Fi network with a VPN from your phone / laptop and go to the site 2ip.ru, check your location. Geolocation of the country where the VPN was purchased means that it works correctly.
- after fully downloading the update, open the Meta Horizon app and accept the offer to link your helmet and account
- we perform binding according to the instructions (enter a 5-digit code in the phone, which is visible in the helmet)
Additional settings
If you link an Arena helmet to your account, you must also enable developer mode in the settings and create a developer account. This is done like this:
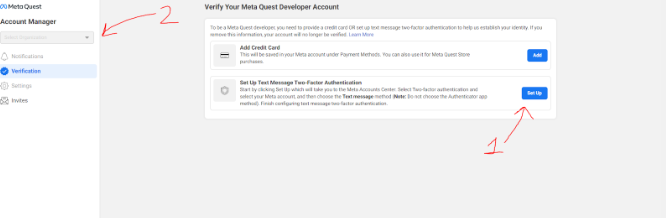
- Go from the VPN to the site, log in under your Arena account and select Set-Up Two-Factor Authentication.

- Will be redirected by a link to the Account Center, where you can click Two-factor authentication in Russian. To continue creating a developer account, either choose to send a text message to your phone number (and thus link it to your account).
- After successfully enabling Two-Factor, go back to the developer page and click Create Organization at the top. Create an organization with any name and create any test project in it. Ready! Now you are a developer, and you can enable developer mode for all helmets linked to this account.
- Select the desired helmet in the devices (compare it by serial number, or enable the setting on each one immediately after linking). Next, headset settings-developer mode - slider ON. After that, you can disable virtual borders on your helmet and install Portal Games from your computer
- It remains to go to the settings of the headset itself: namely Settings - > System -> For Developers. Turn on the slider there and you will see settings that are usually hidden. You need to disable Physical Space Features and enable USB Debugging.
Disabling auto-update via the QUAC program
The program can be downloaded from the link: QUAC
1. Install the program on your computer in the arena;
2. Connect the helmet to your computer via cable and click always allow for this computer;
3. Run the program (which is UTF);
4. The list will load, press 1 and Enter to get to "Manage Updates";
5. Enter a large D in English and Enter to turn off updates;
6. Turn off the helmet and close the program;
7. Repeat step 2-5 for each helmet.
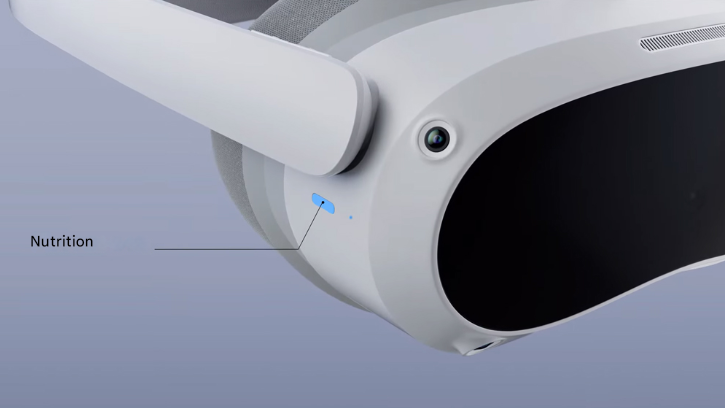
Sealing the darkness sensor
This sensor is responsible for the transition of helmets to sleep mode, why do we ask to seal it? Because when the helmet is transferred from the operator to the client, the helmet goes into sleep mode and the calibration goes off.
In no case should the dark sensor be sealed with black electrical tape, it is recommended to seal it with graphite or gray electrical tape.
Pico
Preparation
In this article, we will learn how to change the Chinese firmware to the European one.
Register a new account on the site Pico. Russia is not in the list of countries - you can choose the Netherlands.
After unpacking, enable Pico 4. Select the Russian interface language and accept the user agreement. If your headset offers you a software update, reject it for now.
Activating Developer Mode
Активируйте режим разработчика:
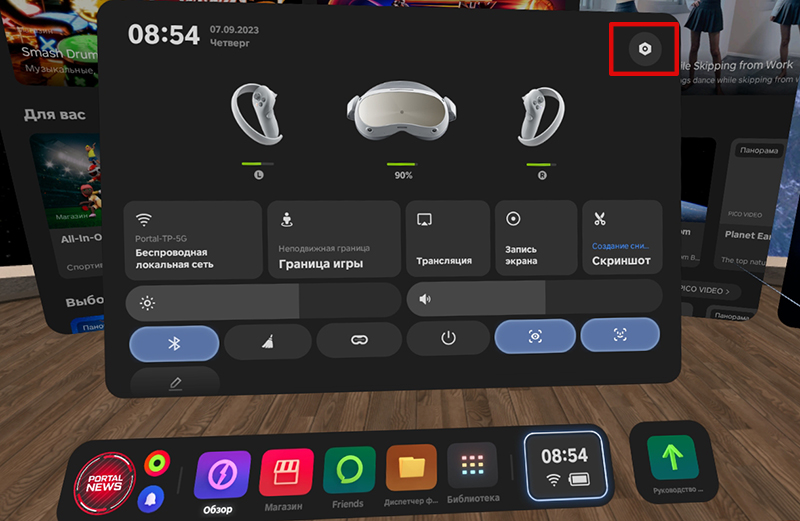
- Для этого перейдите в Быстрые настройки
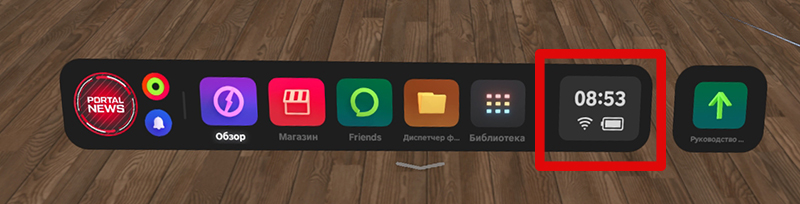
- Далее -- Настройки
- Кликните на Основные. Перейдите во вкладку Информация и пролистайте вниз до Версия ПО. Нажмите не нее 7 раз
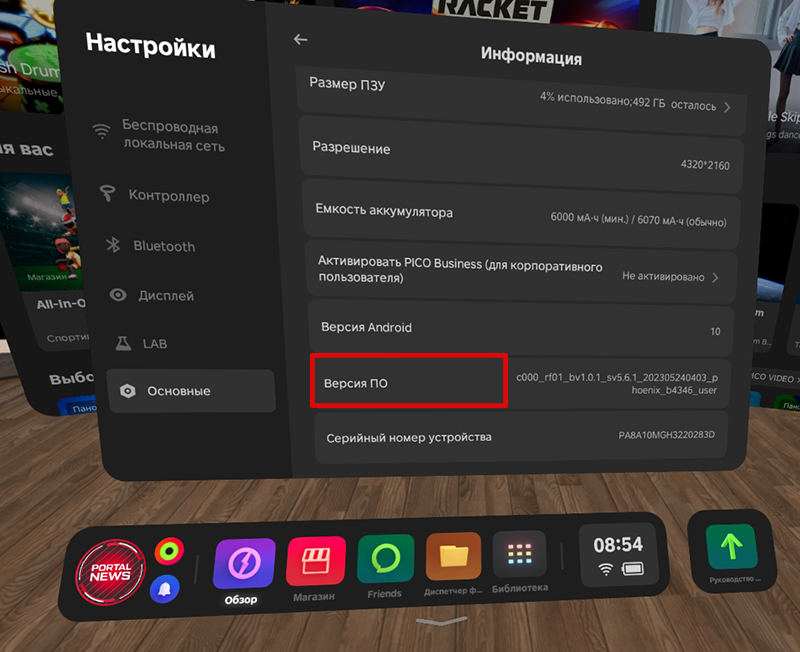
- После семикратного нажатия у вас появиться новая вкладка Разработчик
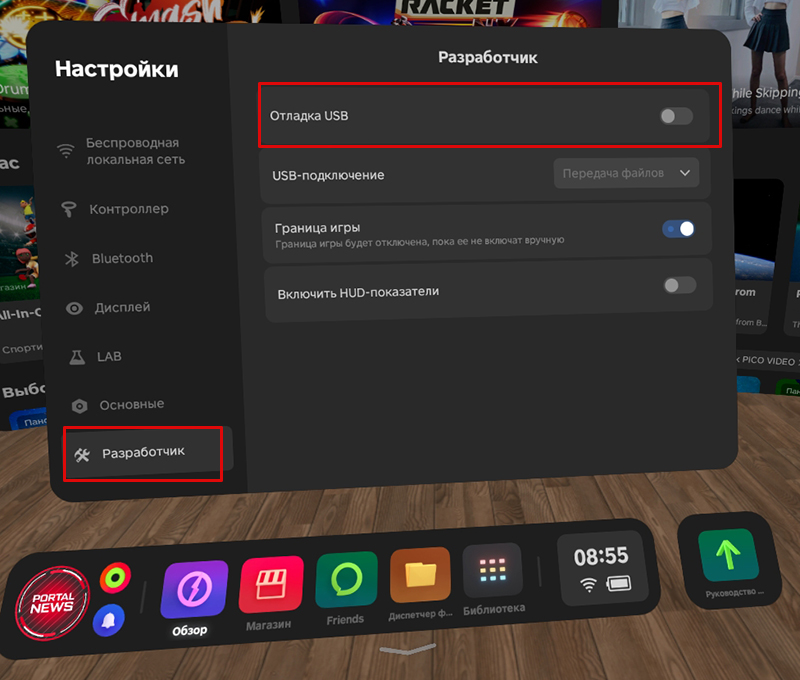
3. Перейдите во вкладку Разработчик и сдвиньте ползунок Отладка по USB.
Проверка состояния OEM
Скачайте батник для проверки состояния OEM Pico 4 по ссылке
После скачивания файла распакуйте архив. Подключите шлем Pico 4 по проводу к ПК и запустите батник.
Вам может выдать 2 варианта: true (OEM) или пустая строка (non-OEM). По непотвержденной информации, Pico 4 выдает всегда true, но на всякий случай проверить необходимо. В зависимости от результата, вам нужно скачать соответствующую глобальную версию не ниже своей прошивки.
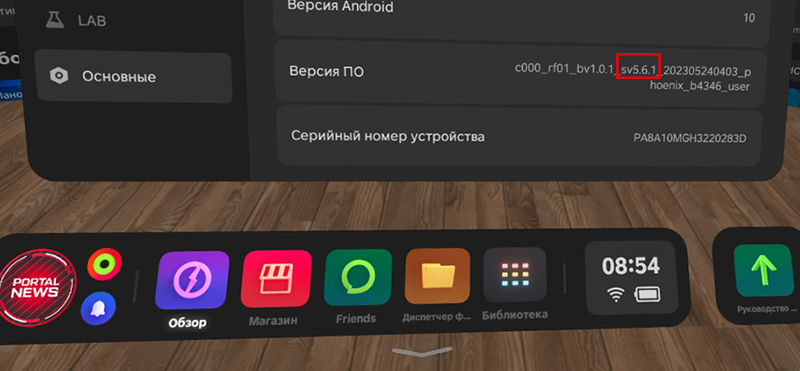
Проверить свою текущую прошивку можно в гарнитуре, нажав Настройки, после перейтте в раздел Информация и спуститься вниз, около серийного номера.
Обновление прошивки на европейский регион
Скачайте прошивку отсюда.
Откройте папку OEM true или OEM false, в зависимости от результата проверки и затем папку с номером необходимой прошивки.
Подключите Pico 4 к компьютеу, после чего зайдите в корневую папку
Мой компьютер -> Pico 4 -> Внутрений общий накопитель.
Создайте папку с названием dload.
Перенесите в эту папку скачанный архив прошивки, не распаковывая его.
После переноса зайдите в шлем в Настройки -> Основные -> Версия системы -> Обновление системы, после чего Вам необходимо выбрать Обновление в автономном режиме.
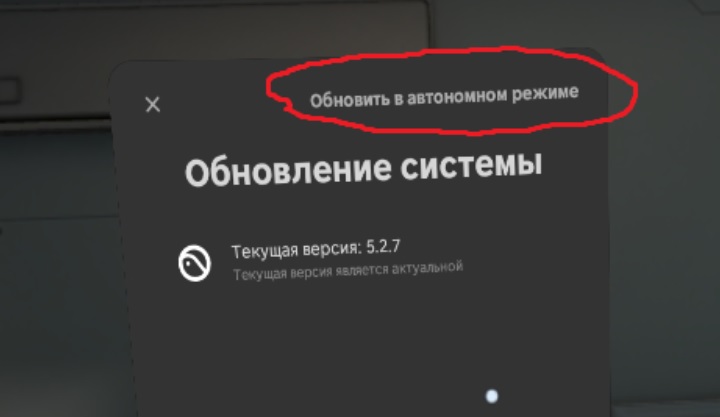
Настоятельно рекомендуем после перепрошивки сделать Сброс до заводскиз настроек, иначе могут проявляться куски китайской прошивки